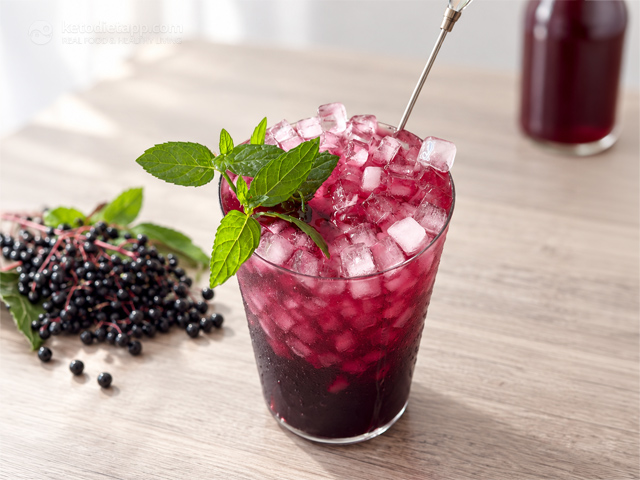
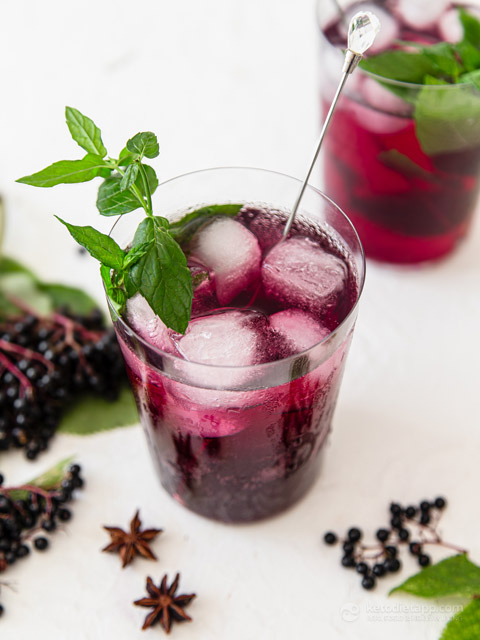
This homemade sugar-free elderberry cordial is fruity, slightly tart and sweet without any added sugar. I make it with fresh elderberries, lemon juice and allulose, plus cinnamon, star anise and cloves.

The basic ratios for elderberry syrup are pretty simple, so you'll see similar amounts of berries and sweetener in a lot of recipes. What I changed after seeing this this BBC Good Food recipe was the spices. I hadn't used cinnamon, cloves or star anise in elderberry cordial before, but now I honestly wouldn't make it without them. You only need a little, so it doesn't taste heavily spiced — it just makes the flavor much better.

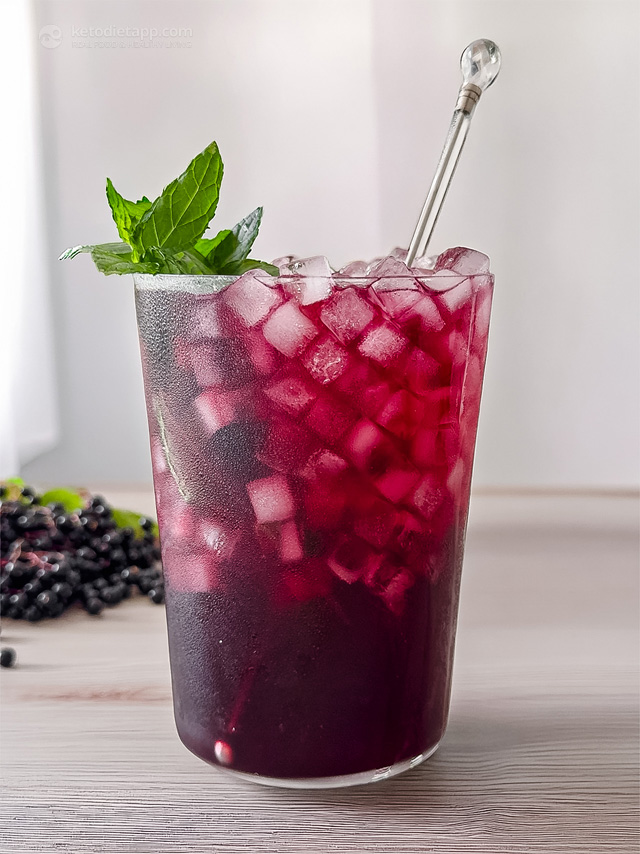
Serve it with still or sparkling water, add some to hot water or tea, or use it anywhere you'd normally use elderberry syrup.

Fresh or Frozen Elderberries?

Fresh elderberries are a late-summer and early-fall fruit. In the UK they're usually ripe from around August into September or October, depending on the weather and location. There are still some around here in Essex in early October. The season varies in the US too, but generally falls somewhere between late summer and early fall.

If you're making this later in the year, frozen elderberries work just as well. They're also a great option if you picked more fresh berries than you could use at once.

Choose fully ripe berries that are deep purple-black. Avoid green or underripe berries and remove the leaves and larger stems before cooking.

Tip: If you're working with freshly picked elderberries, try freezing the clusters first. The berries are often much easier to remove from the stems once frozen.

A Quick Safety Note

Elderberries shouldn't be eaten raw. Raw elderberries and their juice contain naturally occurring compounds that can cause nausea, vomiting and stomach upset.

The leaves and stems shouldn't be eaten either, so remove as much of them as you can and always cook the berries before using them.

What You'll Need

You only need a few ingredients for this cordial:

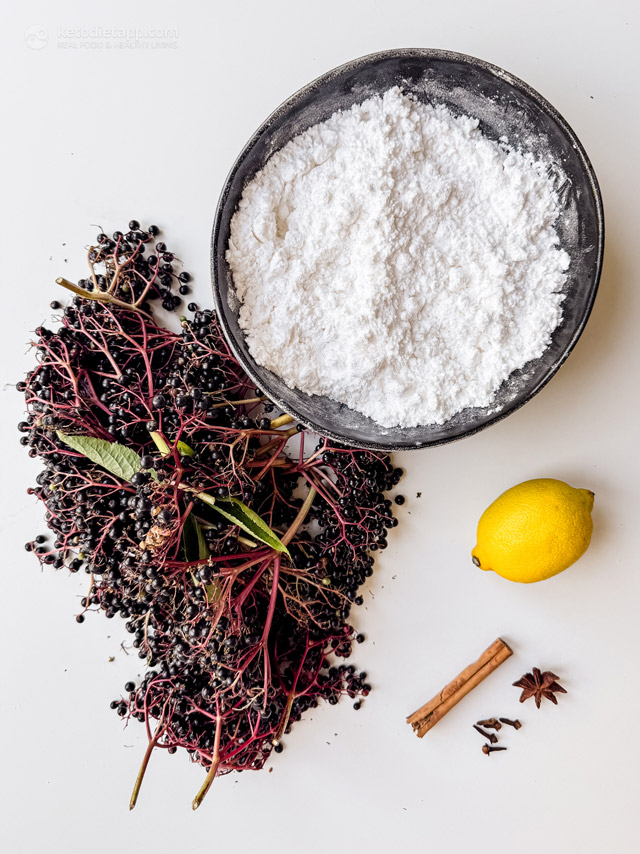
  • Elderberries: Fresh or frozen both work. Use fully ripe, dark purple-black berries.
  • Allulose: This works really well here because it dissolves easily and doesn't have the strong cooling effect you can get with erythritol-based sweeteners. I used powdered allulose in mine but it isn't necessary.
  • Lemon juice: This helps balance the sweetness and stops the cordial tasting flat.
  • Cinnamon, cloves and star anise: You can leave these out, but I wouldn't. You only need a small amount, so they add a subtle warmth without turning the cordial into a heavily spiced drink. Ginger is an option too, although I found it too strong.
How To Make Sugar-Free Elderberry Cordial

Making elderberry cordial is easy, although removing all those tiny berries from the stems does take a little patience.

Once the berries are ready, they're simmered with water and the spices until soft, then strained. The juice goes back into the saucepan with the allulose and lemon juice and is simmered again briefly.

Don't worry if the cordial still looks fairly thin while it's hot. It should stay pourable rather than becoming thick like pancake syrup, and it will thicken a little as it cools.

A Note on the Sweetener

I made this recipe with allulose and that's the sweetener I'd recommend using here. You can experiment with others, but I wouldn't expect them to behave exactly the same way. They can change the sweetness, texture and even how the cordial freezes.
Do I Need to Reduce the Cordial?

A little, yes, but there's no need to cook it down into a thick syrup.

The extra simmering helps concentrate the flavor and removes some of the water, but the finished cordial should still pour easily.

How much it reduces will affect the final yield. My batch made about My batch made about 750 ml (just over 3 cups).

What Can I Use Instead of Allulose?

Allulose works really well in this recipe, but I know it isn't easy to find everywhere.

If you're in the UK, you can still buy allulose online, and it can be worth buying in bulk if you use it regularly. Otherwise, BochaSweet is another good option and is also available online.

Tagatose works well too. It's another rare sugar and behaves much more like regular sugar than many low-carb sweeteners, which makes it a good choice for syrups and cordials.

I would avoid assuming that erythritol-based sweeteners will give exactly the same result. They will have a cooling aftertaste and will behave differently once the cordial is chilled or frozen. Plus, you won't get that thick, syrupy feel.

How Long Does Elderberry Cordial Last?

Keep the cordial refrigerated in a clean, tightly sealed bottle or jar.

Homemade elderberry syrup is generally best kept in the fridge for up to 2 weeks. If you won't use it all within that time, freezing is the better option.

Because this version doesn't contain the large amount of regular sugar used in traditional syrups, I wouldn't assume it will keep longer just because it's sweet.

Can You Freeze Sugar-Free Elderberry Cordial?

Yes, and this is the easiest way to keep it for longer.

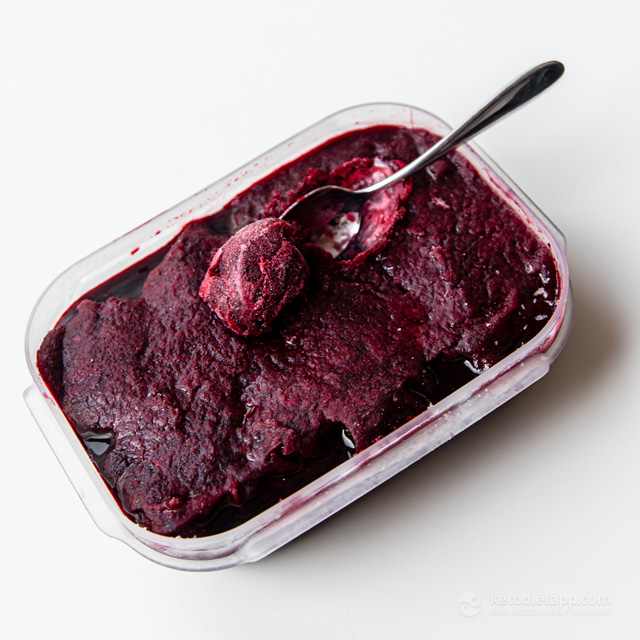
One thing I found when testing this: it doesn't freeze solid.

Because of the amount of allulose, it stays soft and almost slushy in the freezer. I first tried freezing it in ice cube trays, thinking I'd be able to pop out individual portions, but that didn't work at all — the cubes stayed too soft.

Instead, freeze it in a freezer-safe container and leave a little room at the top. Because it stays soft, you can scoop out what you need straight from the freezer.

For best quality, use it within about 6 to 8 months.
Can I Preserve Elderberry Cordial by Water-Bath Canning?

I wouldn't use water-bath canning for this recipe.

Elderberries can vary in acidity, and American and European elderberries aren't always acidic enough for standard water-bath canning. Tested elderberry canning recipes also use specific amounts of regular sugar.

Because this version uses allulose, I wouldn't treat it as a tested canning recipe, even with the lemon juice added.

For longer storage, freeze it instead.

How to Prepare Bottles and Jars

Start with very clean bottles or jars. Wash them, along with the lids, in hot soapy water and rinse well. If you want to take an extra step, heat-safe jars or bottles can be submerged in boiling water for 10 minutes before filling.

Let them drain, then fill with the cordial. This helps keep everything clean, but it doesn't make the cordial shelf-stable. Once cooled, keep it refrigerated or freeze it.

How to Use Elderberry Cordial

Elderberry cordial is concentrated, so you only need a small amount. You can:

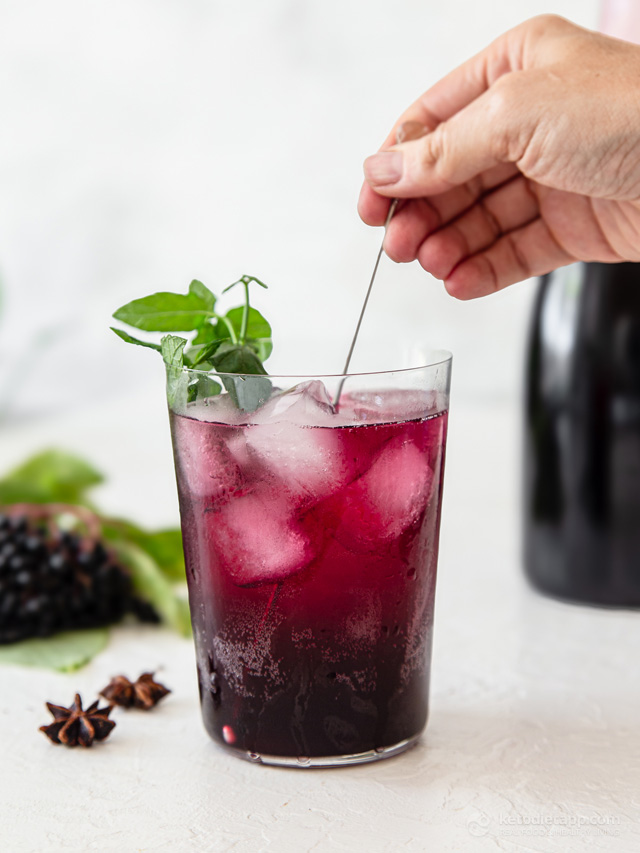
  • dilute it with still or sparkling water
  • add it to hot water or tea
  • add a splash to unsweetened iced tea or lemonade
  • use it in sugar-free cocktails or mocktails
  • drizzle a little over unsweetened yogurt or chia pudding

Start with a small amount and add more to taste.
Common Questions

Can I use frozen elderberries?

Yes. Fresh or frozen elderberries both work well, so you don't need to wait until elderberry season to make this.

Can I use dried elderberries?

I haven't tested this recipe with dried elderberries, so I wouldn't swap them gram for gram. Dried berries are much more concentrated and would need different amounts of water.

Can I leave out the spices?

Yes. You can make the cordial with just elderberries, lemon and allulose. That said, I really do recommend the cinnamon, cloves and star anise. They're used in small amounts, so they add warmth without overpowering the elderberry flavor.

Can I use another sweetener?

You can experiment, but I made and tested this recipe with allulose. Other sweeteners can be much sweeter or behave differently once dissolved or frozen, so I wouldn't recommend a straight 1:1 swap without testing.

Why didn't my elderberry cordial freeze solid?

That's because of the allulose. It lowers the freezing point, so the cordial stays softer and more slushy than plain juice or water. That's also why I recommend freezing it in a container rather than ice cube trays (I've made that mistake once).

More Low-Carb Drinks and Syrups

Looking for more homemade low-carb drinks and syrups? Try these:

Is there another drink you've been missing since going low-carb? Let me know in the comments and I'll see if I can make a sugar-free version!

Preparation time

Hands-on:   20 minutes
Overall:     1 hour 30 minutes

Nutritional values (per serving, 2 tbsp/ 30 ml)

Total Carbs5grams
Fiber1.5grams
Net Carbs3.5grams
Protein0.2grams
Fat0.1grams
of which Saturated0grams
Energy20kcal
Magnesium2mg (1% RDA)
Potassium60mg (3% EMR)

Macronutrient ratio: Calories from carbs (89%), protein (4%), fat (7%)

Ingredients (makes about 750 ml, just over 3 cups)

  • 500 g fresh elderberries, stalks removed (17.6 oz)
  • 2 cups water (480 ml)
  • 1 cinnamon stick
  • 1 star anise
  • 3-5 cloves
  • juice of 1 lemon
  • 500 g Allulose (17.6 oz)

Instructions

  1. Remove the elderberries from the stems, discarding any leaves, green berries or damaged fruit. Rinse well and place in a saucepan. Add 480 ml (2 cups) water.
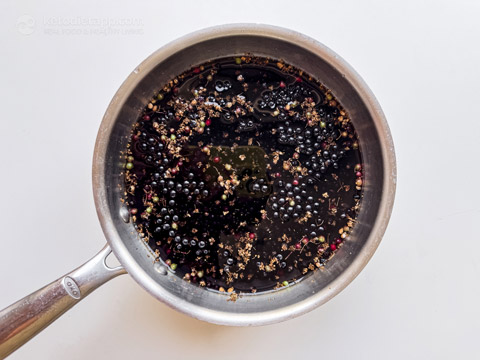
  2. Add the cinnamon, star anise and cloves.
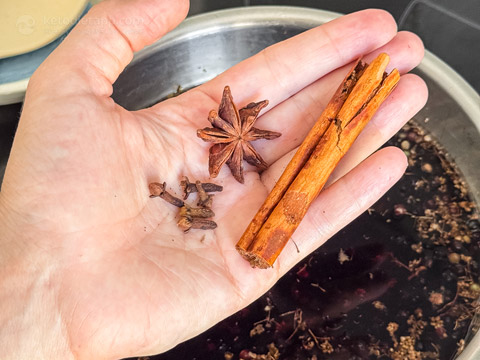
  3. Bring to a boil, then reduce the heat and simmer gently for 15 to 20 minutes, until the berries are soft and have released their juices.
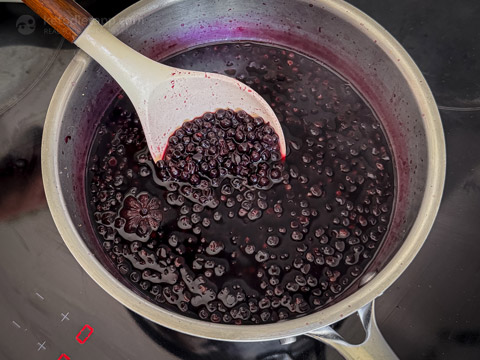
  4. Strain the mixture through a fine-mesh sieve, pressing the berries with the back of a spoon to extract as much juice as possible. Discard the solids.
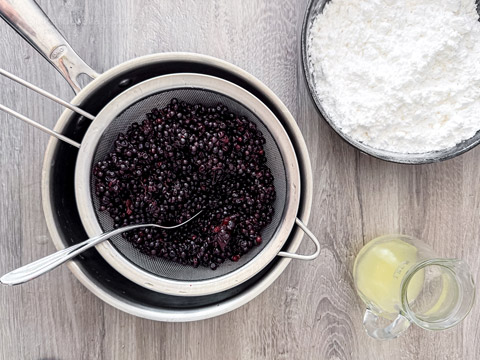
  5. Pour the strained elderberry juice back into the cleaned saucepan. Add the allulose and lemon juice and stir to combine.
  6. Bring back to a gentle simmer and cook for about 10 minutes. The cordial should reduce slightly but will still be fairly fluid rather than thick like a traditional syrup.
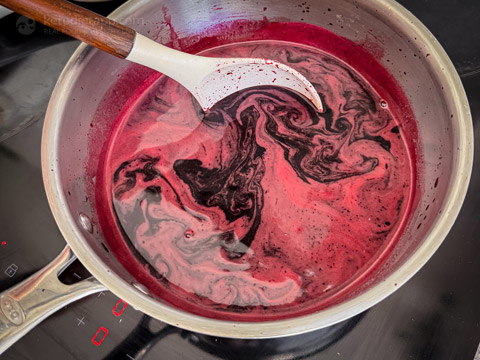
  7. Remove from the heat and pour into clean bottles or jars. Let cool, then refrigerate promptly. Store in the fridge for up to 2 weeks, or freeze for longer storage.
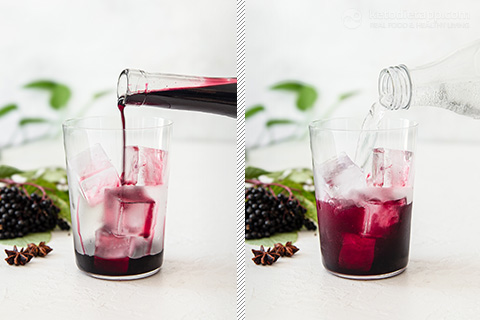
  8. To serve, dilute with still or sparkling water to taste.

from KetoDiet Blog https://ift.tt/3YAKurW
via IFTTT
Sugar-Free Elderberry Cordial (Low-Carb Elderberry Syrup)

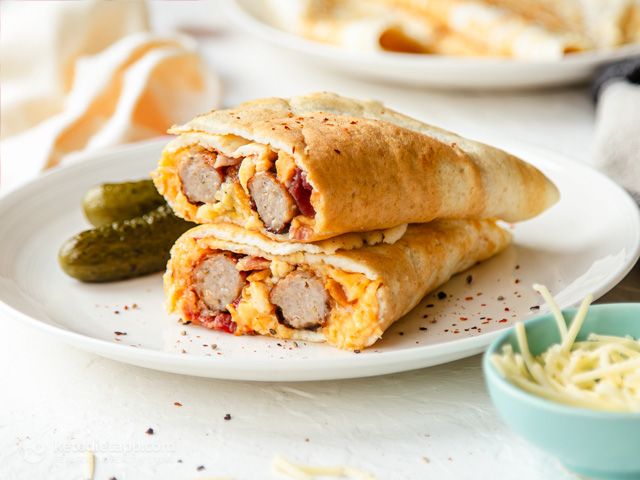
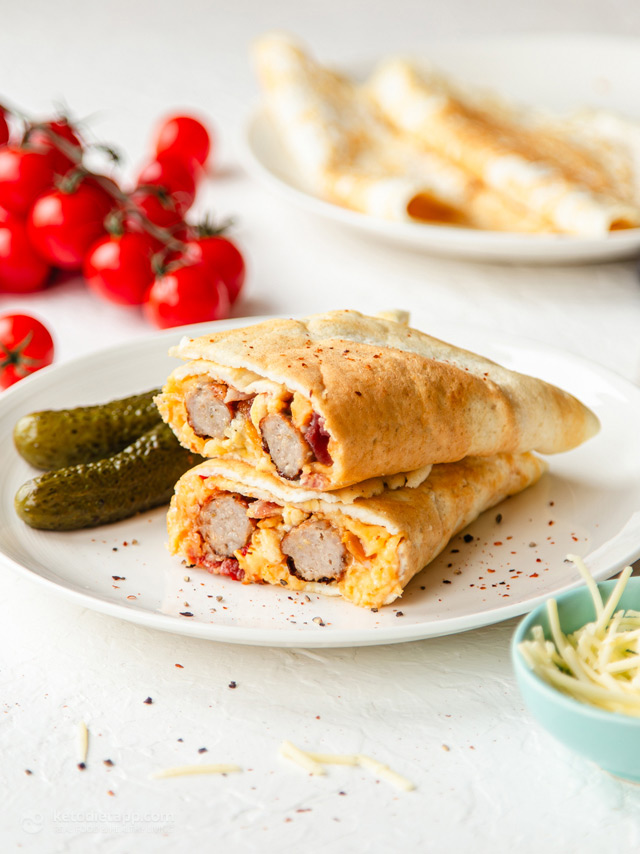
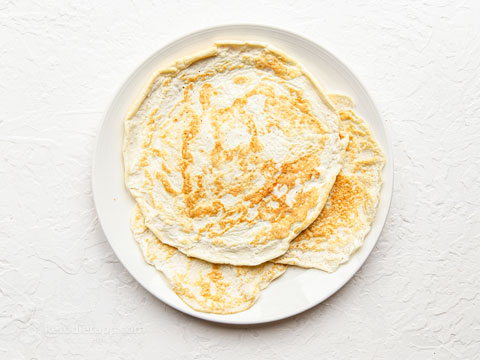
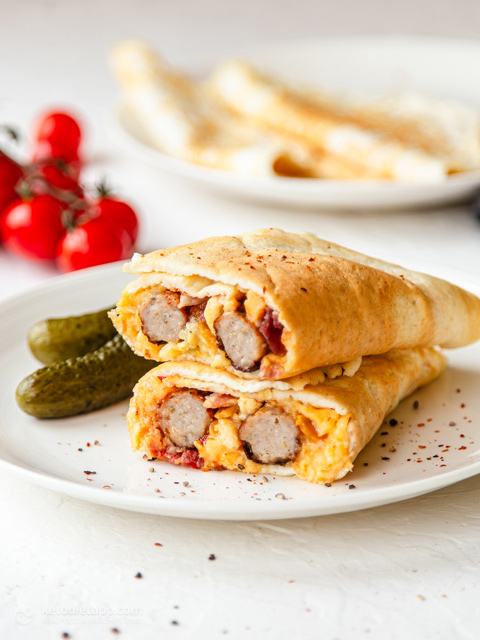
Egg white wraps have been around for a while — you’ve probably seen them in stores — but they’re not always easy to find, and when you can find them, they’re usually overpriced for what they are. I figured it was time to try making my own, and this recipe from Carolyn Ketchum’s new cookbook, The Protein Advantage turned out to be exactly what I needed.

I halved the original recipe because I was using them right away to make these loaded breakfast-style wraps, but they keep well, so doubling (or tripling) definitely makes sense if you're meal prepping.

Why I’ll Keep Coming Back to These Wraps

  • Easy — They’re genuinely easy with minimal ingredients, no weird steps, and they just work.
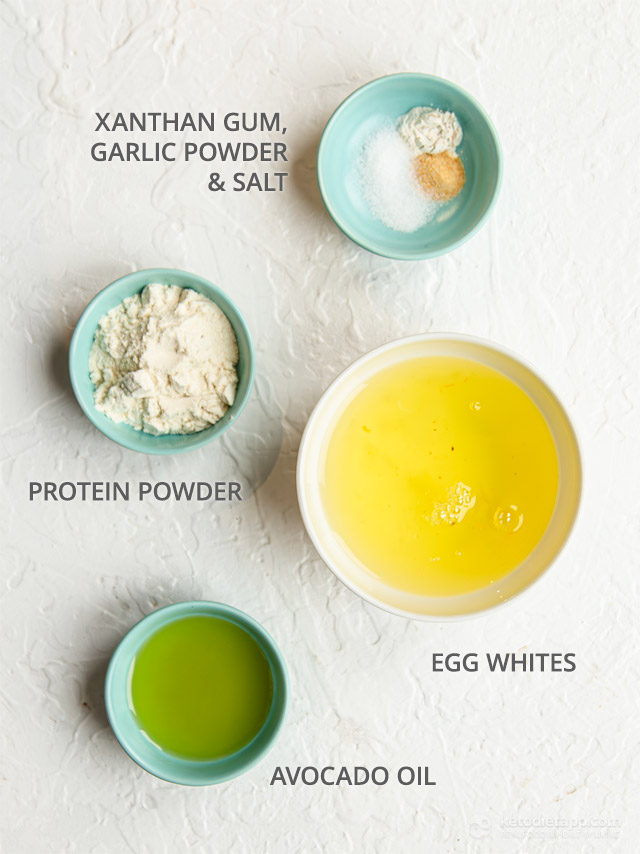
  • Common ingredients — I already had everything on hand (egg whites, protein powder, xanthan gum).
  • Good texture — not too eggy, not crumbly, and they fold without breaking.
  • Great for meal prep — you can make a bunch ahead and they don’t dry out or fall apart in the fridge.
  • Carnivore-style — They’re basically zero-carb, so good for carnivore, keto, or any high-protein plan. Plus, the wraps are also dairy-free and nut-free in case that's what you're looking for.

Ingredients and Swaps

You only need a handful of basic ingredients to make these, and a few small tweaks can change the flavor or make them fully carnivore-friendly.

  • Egg whites – Fresh or carton both work. If you're using whole eggs, separate them and save the yolks for something else (like mayo, aioli, hollandaise, or lemon curd). You could even add a few egg yolks to the scrambled eggs filling later on!
  • Unflavored protein powder – I used whey, but hemp or egg white protein powder also work well (Carolyn notes that hemp may give the wraps a slightly grayish tint).
  • Xanthan gum – This helps bind everything and gives the wraps that flexible, slightly chewy texture. You only need a pinch.
  • Garlic powder (optional) – Totally fine to skip if you're going for a neutral or sweet version.
  • Salt – Just a pinch for flavor balance.
  • Avocado oil (for cooking) – You can also use ghee or lard, especially for a more carnivore-style version. Butter works too, but may brown a little faster.

A Few Things That Helped When Making These Wraps

These wraps are simple, but there are a couple of small things that can make the process even smoother:

  • Go easy on the blending – Over-blending makes the mixture foamy, which can make the batter too thick or airy to spread evenly in the pan.
  • Check the consistency before cooking – If your batter feels too thick (especially after sitting a minute), just add a splash of water and blend briefly to loosen it up.
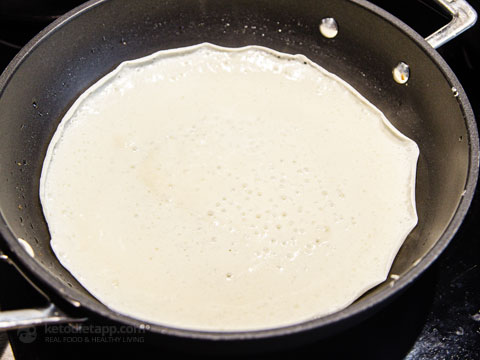
  • Low heat is key – A nonstick pan on low heat works best. If it’s too hot, the batter sets before you’ve had a chance to swirl it.
  • Swirl fast – As soon as you pour the batter into the pan, tilt it to spread it thinly and evenly before it starts cooking.
  • Once it’s set, you can raise the heat – If you prefer a slightly golden wrap (like I do), turn up the heat after the shape is formed, but don’t forget to reduce it again before starting the next one.
  • Use a small pan – A 7–8 inch nonstick skillet gives you the right size for flexible, rollable wraps. Anything bigger, and they’ll be too thin and prone to tearing.

Meal Prep and Storage Tips

These wraps keep really well in the fridge, so they’re easy to prep ahead. Just make sure they’re completely cool before stacking, and place a piece of parchment or baking paper between each one to stop them from sticking. Stored in an airtight container, they’ll stay fresh for up to four days.

To reheat, a dry skillet works best — about 20 to 30 seconds per side is enough to warm them through without drying them out. You can also microwave them briefly if you’re in a rush. The fillings can be made ahead too. I usually store the sausage, bacon, and eggs separately and assemble when I’m ready to eat, especially if using cheese or any sauce.

Recipes You May Like

If you're into low-carb wraps or high-protein handheld meals, here are a few more ideas you might like.

Preparation time

Hands-on:    15 minutes
Overall:     20 minutes

Nutritional values (per serving, wrap)

Total Carbs 3.5 grams
Fiber 0.6 grams
Net Carbs 2.9 grams
Protein 39.2 grams
Fat 35.1 grams
of which Saturated 14.2 grams
Energy 489 kcal
Magnesium 32 mg (8% RDA)
Potassium 414 mg (21% EMR)

Macronutrient ratio: Calories from carbs (2%), protein (32%), fat (66%)

Ingredients (makes 3 servings)

Egg Wraps:

  • 1/2 cup carton egg whites or 4 fresh egg whites (120 g/ 4.2 oz)
  • 2 tbsp unflavored protein powder (15 g/ 0.5 oz)
  • 1/4 tsp xanthan gum
  • Optional: 1/8 tsp garlic powder
  • Pinch salt
  • Avocado oil, for cooking

Filling:

  • 6 chipolatas, or 3 regular meaty gluten-free sausages (190 g/ 6.7 oz)
  • 3 bacon slices, chopped (90 g/ 3.2 oz)
  • 6 large eggs
  • 1 tbsp unsalted butter (14 g/ 0.5 oz)
  • 1/3 cup grated cheddar (38 g/ 1.3 oz)
  • 3 tsp sriracha or sugar-free ketchup, or to taste

Instructions

  1. Blend: In a blender or food processor, combine the egg whites, protein powder, xanthan gum, garlic powder (if using), and salt. Blend on low speed to combine (you don't want the mixture too fluffy).
  2. Cook: Heat a 7- to 8-inch (18 to 20 cm) nonstick skillet over low heat and brush it lightly with oil. Once hot, pour 1/4 cup (60 ml) of the mixture into the center. Immediately swirl the pan to cover the bottom.
  3. Flip & Set: Cook for 1–2 minutes until the edges start to curl and lift easily. Use a spatula to loosen one side, then carefully peel and flip it with your fingers. Cook for 1 more minute, then let cool on a wire rack. Repeat with the remaining batter.
    Note: Keep any wraps you are not planning to use immediately in an airtight container in the refrigerator for up to 4 days. If you prefer a slightly golden wrap, turn up the heat after the shape is formed, but don’t forget to reduce it again before starting the next one.
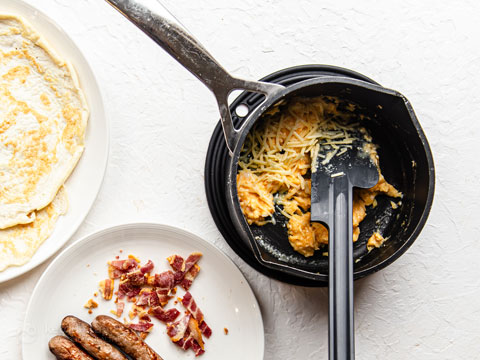
  4. Crisp the Proteins: Place sausages and chopped bacon in a skillet. Cook until the sausages are browned through and the bacon is perfectly crisp.
    Note: You can also use an air fryer at 360 f (180 C) for 8–10 minutes for a hands-off version (bacon and chipolatas). If you use regular sausages, add 5 more minutes to the baking time.
  5. Scramble the Eggs: Whisk the whole eggs with a pinch of salt. Melt butter in a hot pan and cook the eggs, stirring constantly for about 60 seconds. Keep them slightly "soft"—don't overcook! Stir in the grated cheddar until melted and creamy.
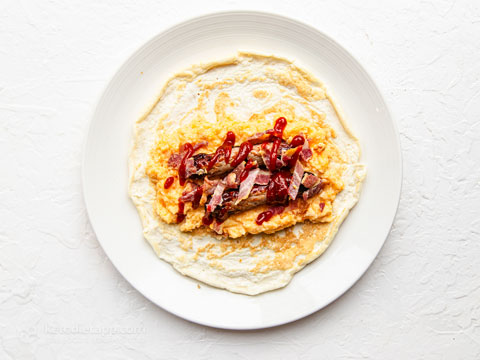
  6. Assemble & Serve: Lay a wrap flat. Spread the cheesy scrambled eggs horizontally across the center. Top with the sausages (cut lengthwise if using large ones) and crisp bacon. Drizzle with sriracha or sugar-free ketchup.
  7. Serve: Fold tightly and slice in half. These wraps are best served warm. If meal prepping, individual fillings can be kept separately in the fridge for up to 3 days.
    PS: If you're looking for more simple, high-protein meals that with with intermittent fasting, check out my Fast Keto ebook!


from KetoDiet Blog https://ift.tt/tFxcX6I
via IFTTT

Loaded Egg White Protein Wraps

Quick Summary tl;dr

After 34 years of failed policy based on bad science and industry lobbying, the government has officially flipped the food pyramid.

Protein is King: Animal protein (steak, eggs) is now the "anchor" of the diet, with daily targets raised significantly to 1.2–1.6 g/kg, or 0.54-0.73 g/lb of body weight per day.

Fat is Back: Butter, tallow, and full-fat dairy are "in"; seed oils and processed carbs are "out."

Grains Demoted: The "base" is gone. Grains are now the smallest category at the bottom (2-4 servings).

The Catch: While the food advice validates the low-carb lifestyle, the new alcohol rules are vague ("less is better" with no hard limits).

If you’ve been following the news, you know that something huge just happened. After 34 years of being told to load up on "heart-healthy" grains and fear the butter dish, the government has officially hit the reset button.

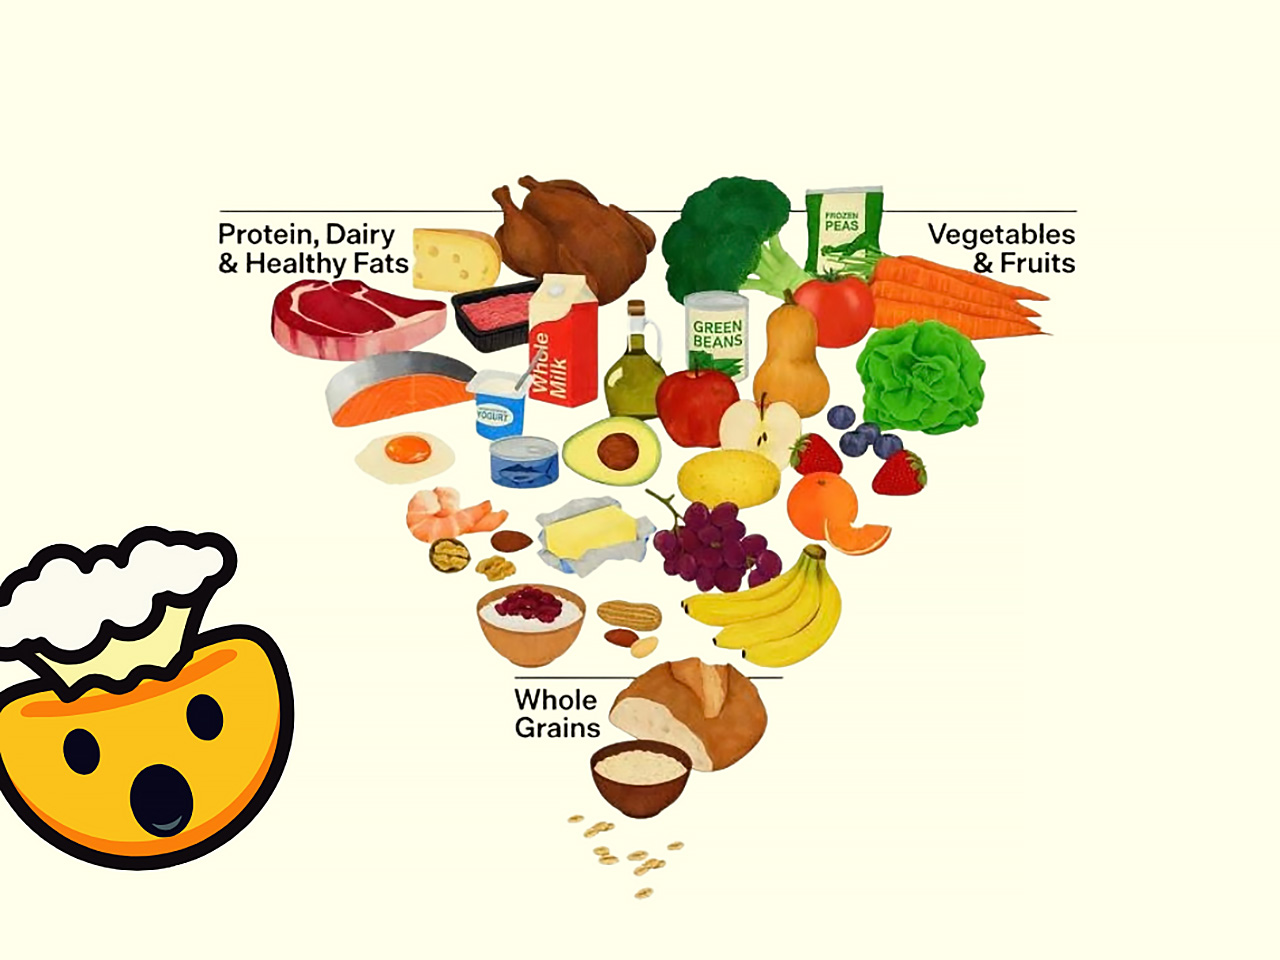
I had to squint at the new "Real Food" pyramid when I first saw it. Is that... steak at the top? And cheese? And are those grains hiding way down in the basement? This starts to look closer to a whole-foods based, low-carb food pyramid!

For years, we’ve been the "crazy" ones skipping the cereal aisle, and now it turns out the new government guidelines are basically just a low-carb cheat sheet. But before we do a victory lap, let’s talk about how we got here, why the old advice was such a disaster, and the few places where this new "Real Food" guide still gets a little messy.

Ending a 34-Year Failed Experiment

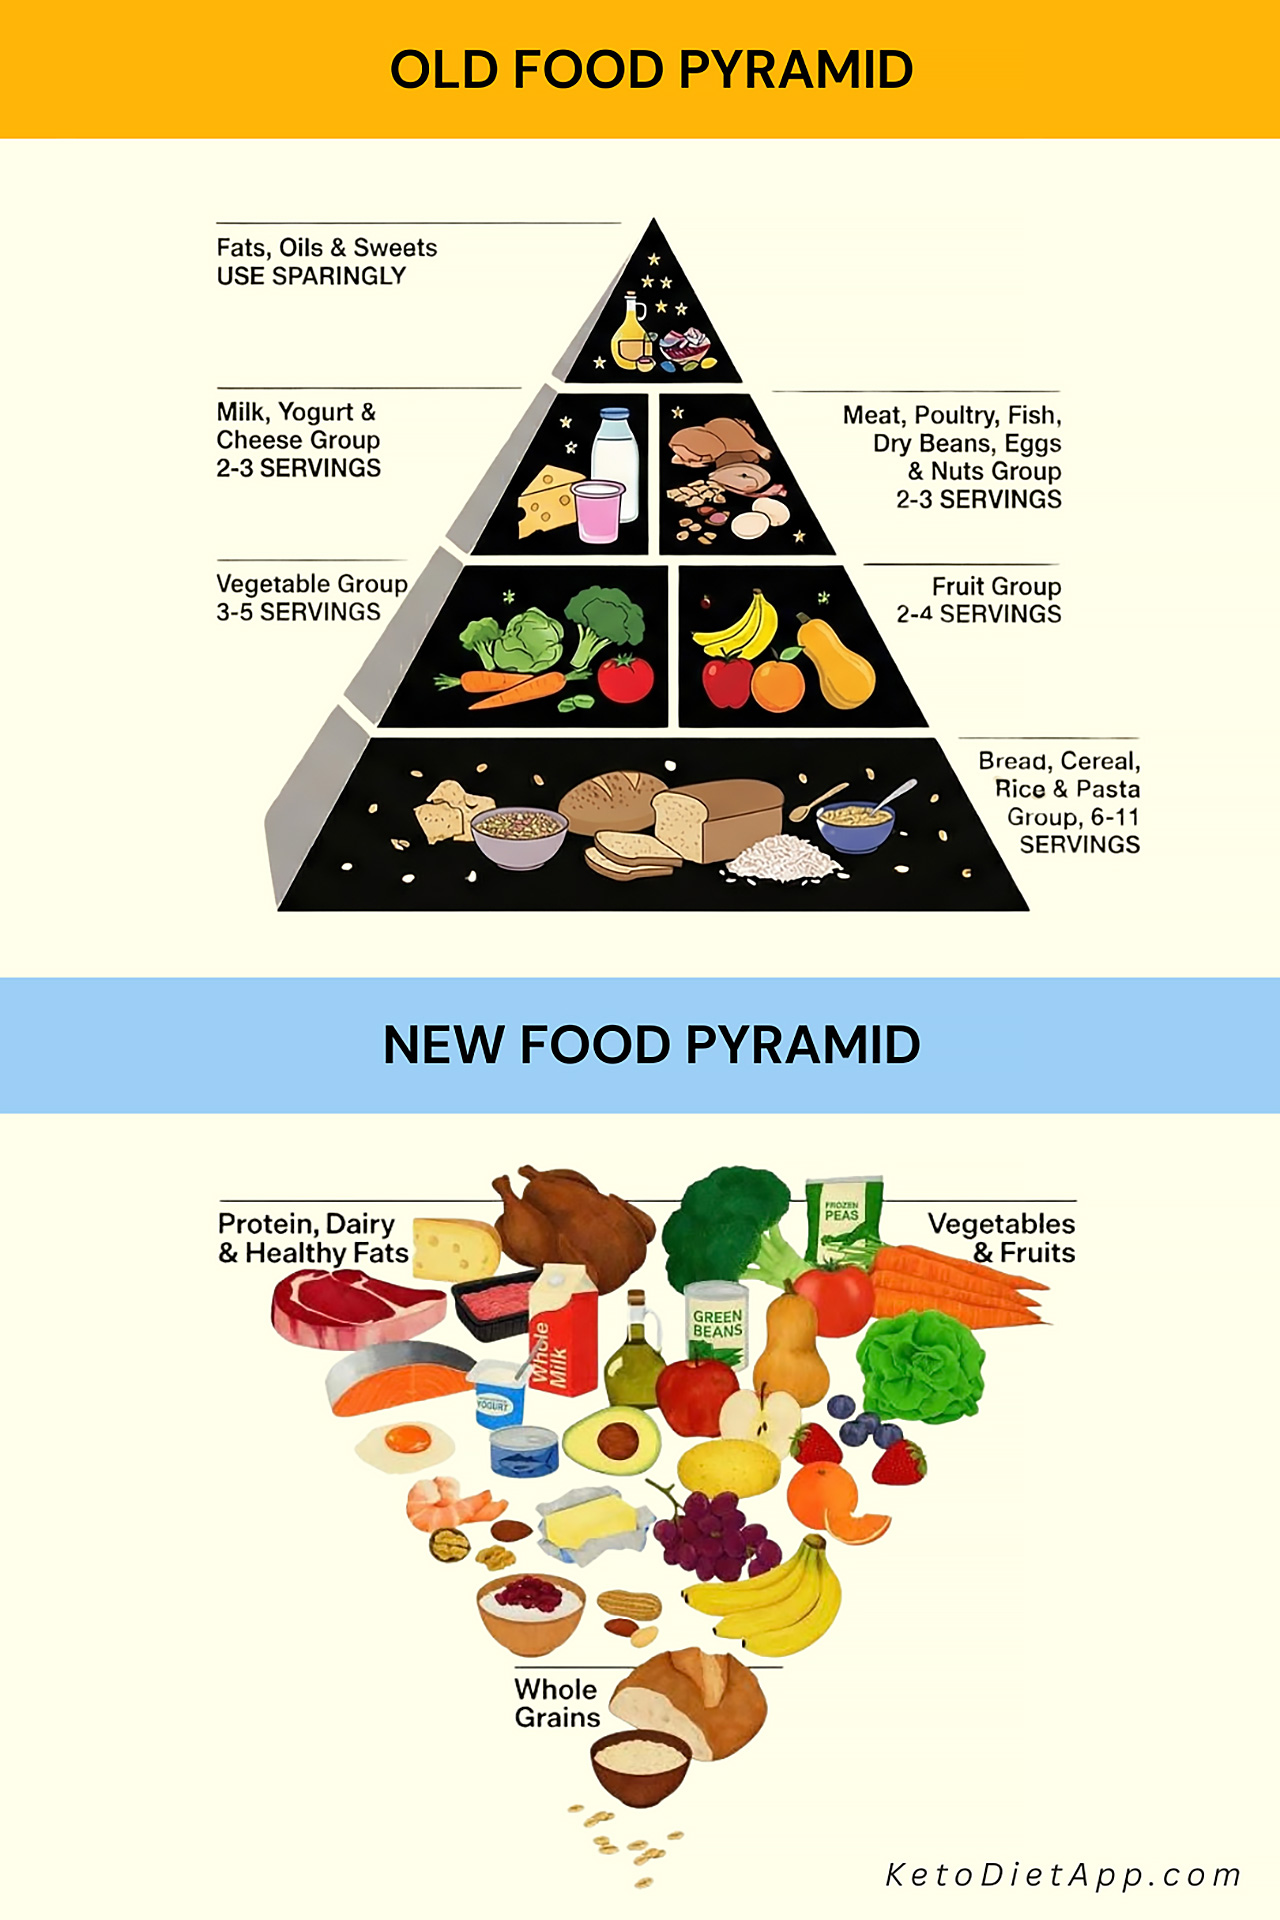
To understand why this is such a massive win, you have to look at what we are finally leaving behind. For over three decades (since 1992!), U.S. nutrition policy was built on a foundation of 6–11 servings of grains a day. Essentially, they told us to build our health on bread and pasta.

And the "science" behind that? It was shaky at best. It largely traces back to Ancel Keys and his "Seven Countries Study," where he famously cherry-picked data to blame saturated fat for heart disease (conveniently ignoring countries like France where people ate fat and lived long lives). (Yerushalmy et al, 1957)

We also know now that contrary results were buried—like the Minnesota Coronary Experiment ( Ramsden et al, 2016), which actually showed that swapping butter for vegetable oil increased death rates.

Add in some industry payoffs from sugar and vegetable oil companies ( Kearns et al, 2016). For example, the American Heart Association itself was launched into a national powerhouse in 1948 thanks to a massive donation from Procter & Gamble, the makers of Crisco ( Teicholz, 2023).

When you follow the money, you end up with a policy that preached "low-fat" while obesity rates skyrocketed. Basically, we’ve been part of a 34-year experiment that didn’t work.

MyPlate vs. The New Pyramid

The previous model, MyPlate, was essentially the old pyramid flattened out. It still marginalized healthy fats and centered meals around grains and starchy vegetables.

The new 2026 guidelines have completely inverted that logic:

  • The Inversion: Grains have been demoted from the "base" to the very bottom tip of the pyramid (now just 2–4 servings).
  • Protein is the New Anchor: Protein recommendations have jumped significantly (aiming for 1.2–1.6 g/kg, or 0.54-0.73 g/lb of body weight per day), with a new focus on animal proteins like meat, eggs, and dairy as the "anchor" of the diet. This is close to what Drs. Stephen Phinney and Jeff Volek have always recommend!
  • Fat is Back: Full-fat dairy and animal fats (like butter and tallow) are back on the menu, acknowledging that natural fats are stable and nutrient-dense.

Excitement... With a Side of Caution

Is this a victory for real food? Absolutely. Seeing "Steak" and "Butter" near the top of a government chart is surreal. But we should stay grounded.

While the food recommendations are solid, other parts of the guidelines are a bit messy. For example, the new alcohol guidance has removed specific drink limits entirely, replacing them with vague "less is better" advice. When asked about it, officials gave confusing answers (suggesting the only rule is "don't drink it for breakfast"), which feels like a step backward in clarity.

The Verdict: The "low-fat, high-grain" era is officially over—at least in the U.S. Science is finally correcting course, but huge systems have massive inertia. It might take a while for the UK, Australia, and other nations to overcome that resistance and follow suit. But as always, we shouldn't wait for any government to tell us what makes us feel good. We've known for years that real food works—now, they’re just catching up.


from KetoDiet Blog https://ift.tt/UrfRXQc
via IFTTT

The Pyramid Just Flipped: Why the New "Real Food" Guidelines Change Everything

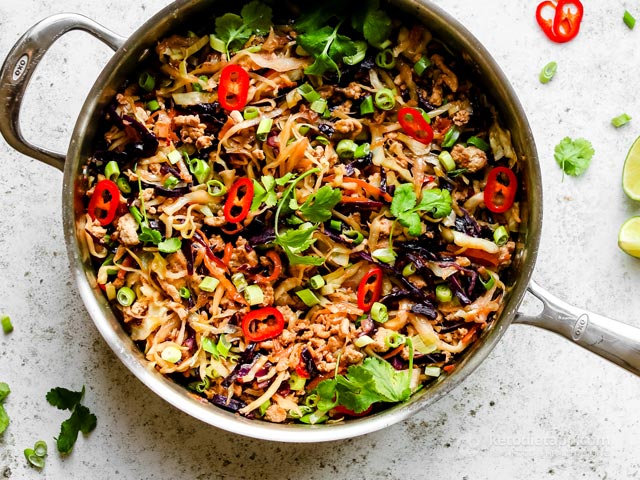
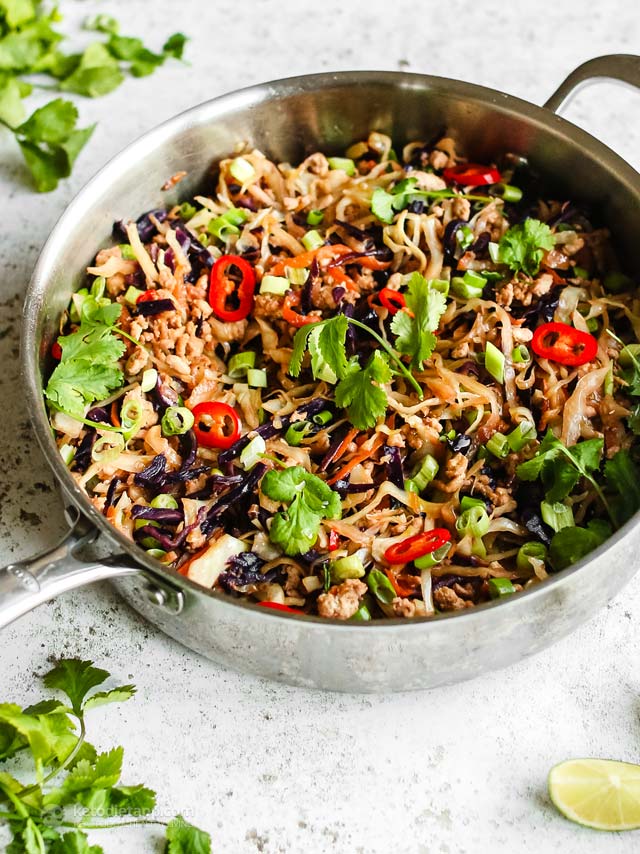
When weeknights get busy, I always reach for quick and simple meals like this Ginger Chili Chicken Stir Fry. It’s my spin on the classic Egg Roll in a Bowl aka Crack Slaw, but with a little extra kick from fresh ginger and chili. Everything comes together in one skillet in under 20 minutes, which makes it a recipe I keep on repeat.

Why I Keep Coming Back to This Stir Fry

  • Protein-packed but light – Ground chicken makes it filling without being heavy.
  • Fast and fuss-free – From pan to plate in under 20 minutes, no complicated steps.
  • Built-in veggies – The coleslaw mix adds crunch and color without extra prep.
  • Big flavor payoff – Ginger and chili bring heat, and the lime plus coconut aminos add a fresh, tangy kick.
  • Easy to change up – Add peanuts, cilantro, or Sriracha for extra flavor.

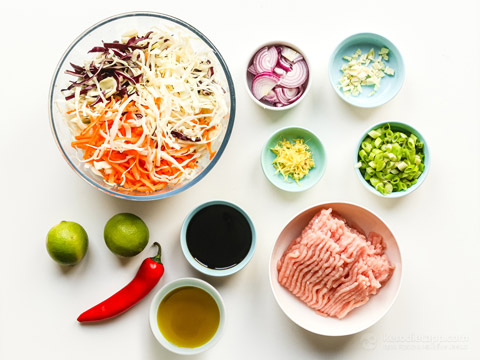
Ingredients & Swaps

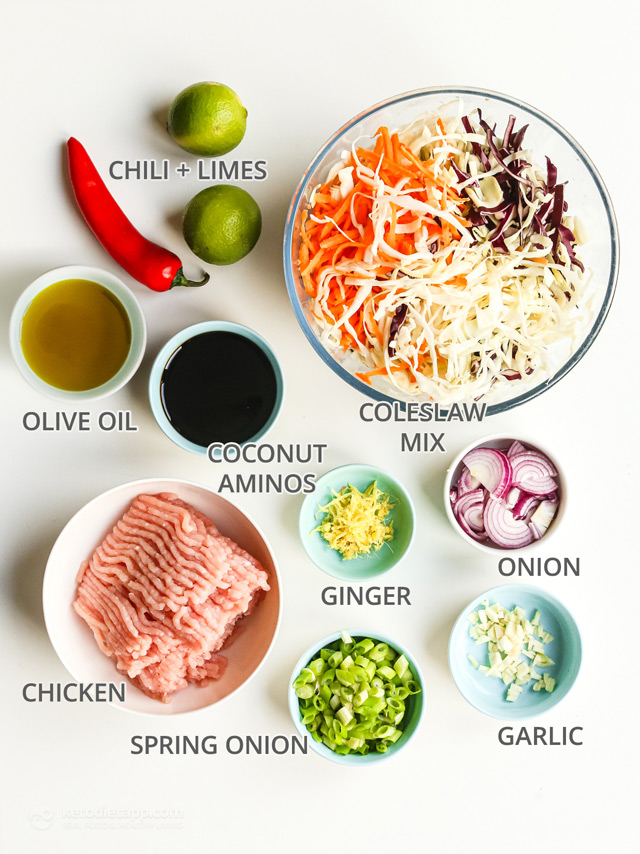
  • Olive oil or ghee – Used for cooking the aromatics and chicken. Avocado oil or coconut oil also work well.
  • Ground chicken – Lean, high in protein, and quick to cook. Swap with ground turkey, pork, or beef if you prefer. Avoid lamb as it's too fatty.
  • Coleslaw mix – The ultimate shortcut with shredded cabbage and a little carrot. If you can’t find it, shred your own cabbage mix.
  • Fresh ginger and garlic – Add sharp, aromatic flavor. Ground ginger or garlic powder can work, but fresh makes a big difference.
  • Red chili pepper – Brings the heat. Use less or remove seeds for mild flavor, or add more for extra spice.
  • Coconut aminos or tamari – Gives a savory, umami punch. Soy sauce works too if you don’t need it gluten-free.
  • Fresh lime or lemon juice – Balances everything with a tangy finish.
  • Onion – Red onion adds mild sweetness, but yellow or white onion also works.
  • Spring onions & other toppings – Finish with sliced spring onion, cilantro, peanuts, or Sriracha for more flavor and texture.

Can I use homemade coleslaw mix?

Yes! If you can’t find ready-made coleslaw mix, you can make your own (I do that all the time!). Just shred green or white cabbage, add some red cabbage, and a little carrot. If you're keto, a small amount of carrot won’t affect your carb count in any significant way. That's just one of many diet myths.

Kitchen Tips for the Best Stir Fry

  • Prep everything first – This cooks fast, so have your veggies chopped and seasonings ready before heating the skillet.
  • Use a hot pan – Medium-high heat helps brown the chicken and keeps the cabbage from steaming.
  • Don’t overcook the cabbage – Toss until just crisp-tender; it should keep a bit of crunch.
  • Adjust spice to taste – Remove chili seeds for milder heat, or add Sriracha for more kick.
  • Balance the flavors – Taste before serving and add extra lime juice, salt, or coconut aminos if needed.

Servings, Storage & Reheating

This recipe makes 4 moderate servings, or 2 larger portions if you prefer a more filling, higher-protein meal.

Let the stir fry cool completely before storing. Keep it in an airtight container in the fridge for up to 4 days. Reheat in a skillet over medium heat with a splash of water or oil, or warm it in the microwave until heated through.

Similar Recipes You Will Love

If this Ginger Chili Chicken Stir Fry is your kind of weeknight dinner, you’ll want to try these other quick and flavorful low-carb recipes too:

Preparation time

Hands-on:    15 minutes
Overall:     15-20 minutes

Nutritional values (per serving, about 225 g/ 8 oz)

Total Carbs 11.5 grams
Fiber 3.6 grams
Net Carbs 8 grams
Protein 28.5 grams
Fat 16.8 grams
of which Saturated 2.6 grams
Energy 310 kcal
Magnesium 37 mg (9% RDA)
Potassium 543 mg (27% EMR)

Macronutrient ratio: Calories from carbs (11%), protein (38%), fat (51%)

Ingredients (makes 4 servings)

  • 1 small red onion (60 g/ 2.1 oz)
  • 1 clove garlic, minced
  • 1 tbsp fresh grated ginger
  • 1 medium red chili pepper (15 g/ 0.5 oz)
  • 4 tbsp virgin olive oil or ghee (60 ml)
  • 500 g ground chicken breasts (1.1 lb)
  • 500 g coleslaw mix (1.1 lb)
  • 1/4 cup coconut aminos or tamari sauce (60 ml)
  • 2 tbsp fresh lime or lemon juice (30 ml)
  • sea salt and pepper, to taste
  • 3 medium spring onions, sliced (45 g/ 1.6 oz)
  • Optional to serve: fresh cilantro, more lime juice, chopped roasted peanuts, and Sriracha sauce (I make my own Fermented Sriracha Sauce)

Instructions

  1. Peel and slice the red onion, mince the garlic, grate the ginger.Slice the chili pepper and remove the seeds.
    Note: For homemade coleslaw mix made with fresh carrot, white and purple cabbage, check recipe tips.
  2. Place sliced red onion in a skillet greased with olive oil (or ghee). Cook for 2-3 minutes until fragrant. Add garlic, ginger and chili pepper.
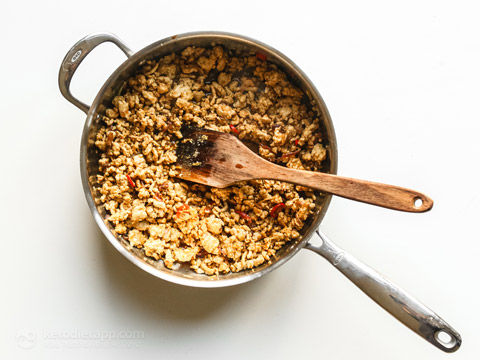
  3. Add ground chicken. Use a spatula to break into pieces. Cook on medium-high for 5 to 8 minutes until browned.
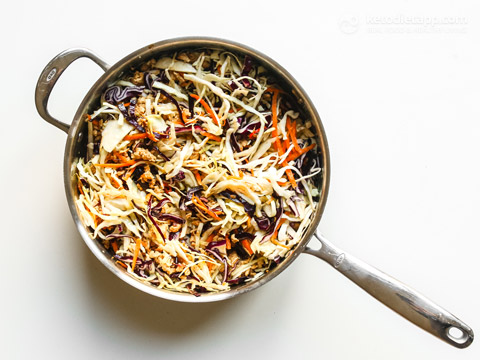
  4. Add the coleslaw mix. At first this will seem like a lot but the cabbage will cook down. Using tongs, toss while cooking.
  5. Mix in the coconut aminos and lime juice.
  6. Cook for about 10 minutes or until the cabbage is crisp tender. Take off the heat and set aside. Optionally, season with salt and pepper to taste.
  7. Sprinkle with spring onion and serve with lime wedges. You can optionally add cilantro, chopped roasted peanuts and/or a drizzle of Sriracha sauce.
  8. To store, let it cool down and refrigerate for up to 4 days. Reheat before serving.


from KetoDiet Blog https://ift.tt/HxLQsni
via IFTTT

Ginger Chili Chicken Stir Fry

I’ve been working on a series of oatmeal recipes, and this high-protein keto oatmeal is where it all started. It’s my base recipe — simple, creamy, and so close to real oatmeal that you won’t miss the oats one bit.

What I love about it is that it’s completely dairy-free, egg-free, and can be made nut-free, so just about anyone can enjoy it. And unlike some keto porridges that turn out gloopy or grainy, this one has the perfect texture — thick, smooth, and really satisfying.

It’s also quick to make and keeps me full for hours, which makes it perfect for busy mornings. I usually top mine with a drizzle of allulose syrup (the chocolate and pancake syrups are my go-tos), a few fresh berries, and sometimes even a little dark chocolate. Pure comfort in a bowl.

Why You’ll Love This Recipe

  • High in protein – Keeps you full and energized for hours.
  • Perfect texture – Creamy and hearty, just like real oatmeal!
  • Allergy-friendly – Naturally nut-free, dairy-free, and egg-free.
  • Quick & easy – Ready in minutes with simple pantry ingredients.
  • Great for meal prep – Mix dry ingredients ahead for grab-and-go convenience.
  • Customizable – Add berries, chocolate chips, or sugar-free syrup to suit your taste.

Ingredients and Swaps

  • Shredded coconut – Toasted briefly for flavor and sweetness. If you’re not nut-free, you can also sprinkle toasted almond or coconut flakes on top just before serving for extra crunch.
  • Coconut flour – Helps thicken and gives a creamy consistency.
  • Chia seeds – Add natural thickness and fiber.
  • Hemp seeds – Provide protein, magnesium and healthy fats.
  • Flax meal – Adds a hearty texture and extra fiber.
  • Collagen powder – Boosts protein without changing flavor. I like Perfect Keto or Equip (20% off Perfect Keto here | 20% off Equip here). Unflavored is best. If you use flavcored options, go easy on any sweetener topping.
  • Cinnamon – Adds warmth and flavor; adjust to taste.
  • Almond milk – Use unsweetened almond milk to keep carbs low. Any unsweetened nut or seed milk will work — I love House of Macadamias nut milk (15% off here). For nut-free, simply use seed milk or light coconut milk.
  • Optional toppings – Drizzle with RxSugar allulose syrup (20% off here), add fresh berries, more cinnamon, or a few dark chocolate chips.

Can I use dairy milk?

No — even full-fat milk is too high in carbs to keep this recipe keto-friendly. If you’d like to use dairy, mix 2 tablespoons of heavy cream with enough water to make 3/4 cup (180 ml). This gives you the creamy texture without the extra carbs.

Can I make this ahead for meal prep?

Absolutely. Mix the dry ingredients in bulk (8× the recipe is a good amount). Store in a jar and scoop out 1/2 cup per serving. Just add hot milk of choice, stir, and your oatmeal is ready in minutes. The dry mixture can be kept at room temperature for up to a month.

What can I use instead of collagen?

Collagen adds protein without changing the flavor. If you don’t have any, just skip it — the oatmeal will still work. For extra protein, you can stir in a scoop of whey, egg white, or plant-based protein powder (adjust liquid as needed).

Is this keto oatmeal low FODMAP?

Not as written, since it uses coconut flour which can be high FODMAP in larger amounts. Shredded coconut can be high FODMAP in larger amounts, but 2 tbsp is within the low FODMAP serving size. To make this recipe more suitable for a low FODMAP diet, swap the coconut flour with additional flax meal or chia seeds. You’ll still get a thick, creamy texture without the FODMAP load.

Tips for Best Results

  • Toast the coconut – Just 1–2 minutes in a dry pan makes a big difference in flavor.
  • Stir often – Hemp, flax, and chia thicken quickly; stirring prevents clumps.
  • Adjust thickness – Add more milk if you prefer a looser, porridge-style texture.
  • Add crunch last – If using almond or coconut flakes, sprinkle them on right before serving so they stay crisp. Same applies to chocolate chips (dark or sugar-free milk/white).
  • Meal prep smart – Mix the dry ingredients ahead (x8 works well) and scoop out 1/2 cup per serving. Add hot milk, stir, and it’s ready in minutes.

Storage Tips

This high-protein keto oatmeal is best enjoyed fresh, but you can also make it ahead. Store it in a sealed container in the fridge for up to 1 day. Reheat gently on the stovetop or in the microwave, adding a splash of nut or seed milk if it gets too thick.

You can also enjoy it cold straight from the fridge. For toppings like allulose syrup, berries, or chocolate chips, add them just before serving so they stay fresh and crunchy.

If you’d like to prep ahead, mix the dry ingredients and store them at room temperature for up to a month — then simply measure out 1/2 cup per serving and add hot milk of choice whenever you’re ready to make it.

Recipes You Will Love

Love this high-protein oatmeal? Try more of my favorite low-carb porridges and creamy breakfast bowls!

Preparation time

Hands-on:    15 minutes
Overall:     15 minutes

Nutritional values (per serving)

Total Carbs 17.3 grams
Fiber 13.1 grams
Net Carbs 4.2 grams
Protein 28.2 grams
Fat 23 grams
of which Saturated 4.4 grams
Energy 382 kcal
Magnesium 184 mg (46% RDA)
Potassium 611 mg (31% EMR)

Macronutrient ratio: Calories from carbs (5%), protein (34%), fat (61%)

Ingredients (makes 1 serving)

Instructions

  1. Measure out all of the dry ingredients so they’re ready to go.
  2. Place the shredded coconut in a dry saucepan and toast over medium heat for 1–2 minutes, stirring often, until lightly golden and fragrant. Watch closely, as coconut can burn quickly.
  3. Add the remaining dry ingredients and pour in the almond milk (or cream + water mixture for a dairy option — see tips).
  4. Stir well to combine. Cook for 2–4 minutes over medium heat, stirring frequently, until the mixture thickens into a porridge-like consistency.
  5. Remove from the heat and transfer to a serving bowl. Add any toppings you like — allulose syrup, fresh berries, a sprinkle of cinnamon, or dark chocolate chips.
  6. Enjoy hot, or refrigerate for up to 1 day. Reheat gently with a splash of milk if it thickens too much, or enjoy cold.


from KetoDiet Blog https://ift.tt/pRDPK5E
via IFTTT

High-Protein Keto Oatmeal

To Prepare and Cook Delicious Meal Read These Free Recipes - CLICK BELOW