If you want chewy keto cookies with the perfect crunch on top, look no further. These cookies are are absolutely delicious! I started testing the first batches more than 2 years ago and recently revisited the recipe to finally end up with these amazing cookies.

We've got easy low-carb cookies packed with chunks of dark chocolate and crunchy pecans enhanced with hints of vanilla, lemon zest and flaky sea salt. Deliciously chewy cookies with no sugar and no gluten!

Recipe Tips

The chewiness comes from the additional psyllium although you could make them even chewier by swapping Allulose for the Erythritol. I'd still keep the brown sugar substitute as it ads that perfect caramel finish. Another option you could use instead of psyllium of gelatin powder (not to confuse with collagen which does not gel).

I used chopped 90% dark chocolate which is a great low-carb option. You could use 85% dark chocolate or sugar-free chocolate bar or chocolate chips.

Pecans, which can be substituted with walnuts, will add a tasty crunch. If you need to keep this recipe nut-free, use pumpkin seeds or sunflower seeds and swap ground sunflower seeds for the almond flour.

Instead of baking powder

Now a few tips for the flavor-enhancing ingredients. Instead of vanilla extract you can use 1/2 tsp vanilla bean powder, seeds from 1 vanilla bean or 1/2 tsp cinnamon. Finally, this recipe also uses fine lemon zest which can be substituted with finely grated orange peel for that perfect festive touch.

Preparation time

Hands-on:    15 minutes
Overall:      1 hour

Nutritional values (per cookie)

Total Carbs 5.9 grams
Fiber 2.8 grams
Net Carbs 3.1 grams
Protein 5.1 grams
Fat 27.5 grams
of which Saturated 10.2 grams
Energy 278 kcal
Magnesium 61 mg (15% RDA)
Potassium 204 mg (10% EMR)

Macronutrient ratio: Calories from carbs (4%), protein (7%), fat (89%)

Ingredients (makes 9 large cookies)

Instructions

  1. Place softened butter, Swerve and vanilla extract into a bowl. Using an electric mixer, beat until well combined and creamy.
    Note: For best results (chewier cookies), use Allulose instead of Erythritol.
  2. Add the egg and beat again (don't worry if it splits a little). If you are using vinegar instead of cream of tartar, add it too. Add fresh zest from half a lemon.
  3. In another bowl, combine the dry ingredients. Use a whisk or the hand mixer to mix the almond flour, coconut flour, psyllium powder, baking soda and cream of tartar.
  4. Add about half a cup of the dry mix while beating slowly, and then add all of the dry mix and beat until sticky dough forms.
  5. Add chopped dark (or sugar-free chocolate (or chocolate chips) and chopped pecans (or walnuts). Stir to combine with a spatula. Place the dough in the fridge for at least 30 minutes or overnight.
  6. Preheat the oven to 160 °C/ 320 °F (fan assisted), or 180 °C/ 355 °F (conventional). Using a large cookie scoop or a spoon, measure out 9 cookies (about 57 g/ 2 oz each). Scoop the dough onto a tray lined with parchment paper. Leave large 7-8 cm (3 inch) gaps between each (if needed, use two baking trays).
  7. Using your hand, flatten the dough. Sprinkle with flaky sea salt.
  8. Place in the oven and bake for 10 to 12 minutes, rotating the tray halfway to ensure even baking.
  9. To store, keep refrigerated for up to a week, or freeze for up to 3 months.


from KetoDiet Blog https://ift.tt/2XFghlY
via IFTTT

Chewy Keto Chocolate Chip Cookies

I've always loved chicken wing sauce but I found many recipes to be too buttery and greasy, too salty and too vinegary.

In this recipe I used slightly less butter, less vinegar, and added some coconut aminos for subtle sweetness. I kept the Worcestershire sauce for the perfect umami.

For the hot pepper sauce you can use Frank's Redhot Sauce which is sugar-free, or you can use store-bought Sriracha sauce, although many brands have added sugar. Finally, you can use our homemade Sriracha Sauce which is sugar-free.

Once you make this DIY Buffalo Sauce, follow this Chili-Lime Crispy Chicken Wings recipe for ultra crispy chicken wings and then use the buffalo sauce for dipping instead of the sweet chilli sauce. Alternatively, you can coat the wings with the sauce before baking, just like we did in this Baked Buffalo Chicken Wings recipe.

This recipe will make slightly over a cup, which is about 8 servings if you use 2 tablespoons per serving. I listed values per tablespoon in the nutrition facts below for simplicity.

Preparation time

Hands-on:    5 minutes
Overall:     5 minutes

Nutritional values (per 1 tbsp/ 15 ml)

Total Carbs 0.6 grams
Fiber 0.1 grams
Net Carbs 0.4 grams
Protein 0.1 grams
Fat 4.2 grams
of which Saturated 2.5 grams
Energy 40 kcal
Magnesium 0 mg (0.07% RDA)
Potassium 6 mg (0.3% EMR)

Macronutrient ratio: Calories from carbs (4%), protein (1%), fat (95%)

Ingredients (makes about 1 cup, 255 ml/ 8.5 fl oz)

  • 2/3 cup hot pepper sauce such as Frank's Redhot Sauce or Sriracha (160 ml/ 6 fl oz) - you can make your own
  • 3/4 stick unsalted butter (85 g/ 3 oz)
  • 1 tbsp apple cider vinegar or white wine vinegar (15 ml)
  • 1 tbsp coconut aminos (15 ml)
  • 1 tsp Worcestershire sauce
  • 2 cloves garlic or 1/4 tsp garlic powder
  • 1/4 tsp sea salt, or more to taste
  • Optional: 1/8 tsp cayenne pepper, or more to taste

Instructions

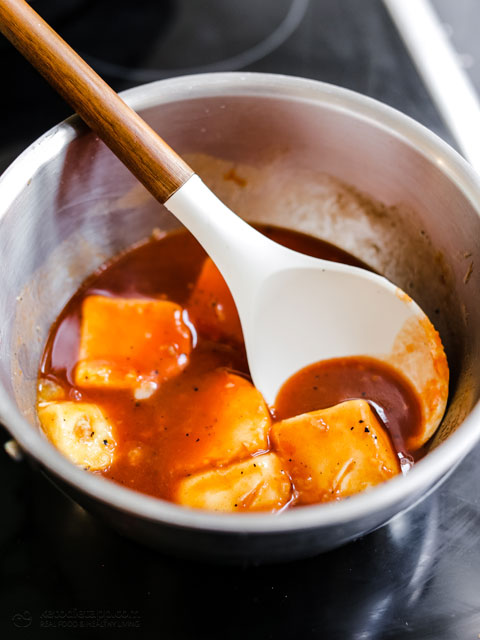
  1. Place all of the ingredients in a saucepan: hot sauce, butter, vinegar (apple cider or white wine vinegar), coconut aminos, Worcestershire sauce, crushed garlic cloves (or 1/4 tsp garlic powder) and salt.
    Note: You can use any hot pepper sauce such as Frank's Redhot Sauce (sugar-free), or you can use store-bought Sriracha sauce (may contain sugar), or use our homemade sriracha sauce which is sugar-free.
  2. Bring to a simmer and cook on medium heat while stirring. Once the sauce starts to bubble, take off the heat and whisk to combine. Taste and season with more salt if needed. For extra heat you can add a pinch of cayenne pepper.
  3. Transfer to a storage jar and let it cool down. To store, refrigerate for up to 2 weeks. Use this sauce instead of the sweet chilli-lime sauce in this recipe!


from KetoDiet Blog https://ift.tt/3lYhPAX
via IFTTT

5-Minute Buffalo Chicken Wing Sauce

This apple crumble (or apple crisp) is the perfect dessert for fall. It's low-carb, diebetic-friendly, gluten-free, and there are no actual apples needed... but you will never know!

We're using zucchini (courgettes) which is the perfect alternative to apples. When baked with cinnamon and nutmeg, it tastes just like apples. And don't forget about the lemon juice, it will add the perfect tang and make this "apple" crisp even more authentic!

This is a recipe for two so you never have to worry about leftovers, but you can easily scale it up yo make 4 to 8 servings.

If you like crumbles, check out some of these low-carb recipes:

Preparation time

Hands-on:    10 minutes
Overall:      1 hour 15 minutes

Nutritional values (per serving, half a crumble)

Total Carbs 12 grams
Fiber 4.5 grams
Net Carbs 7.5 grams
Protein 7.5 grams
Fat 36.7 grams
of which Saturated 15.5 grams
Energy 387 kcal
Magnesium 96 mg (24% RDA)
Potassium 573 mg (29% EMR)

Macronutrient ratio: Calories from carbs (8%), protein (8%), fat (84%)

Ingredients (makes 2 servings)

"Apple" base:
  • 2 medium or 3-4 small zucchini, peeled (300 g/ 10.4 oz)
  • 1 tbsp lemon juice (15 ml)
  • 2 tbsp unsalted butter, ghee or coconut oil (28 g/ 1 oz)
  • 1/4 cup granulated sweetener such as Erythritol, Swerve or Allulose (40 g/ 1.4 oz)
  • 1/2 tsp ground cinnamon
  • 1/8 tsp ground nutmeg
Crumble topping:

Instructions

  1. Preheat the oven to 180 °C/ 355 °F (fan assisted), or 200 °C/ 400 °F (conventional). Peel and halve the zucchini lengthwise.
  2. Slice the zucchini into 1/2 inch (1 cm) pieces. Place in a baking dish (I use a round 24 cm/ 9 1/2 inch baking dish). Add the lemon juice and butter (or coconut oil). Sprinkle with sweetener, cinnamon and nutmeg.
  3. Cover with a piece of baking foil and place in the oven. Bake for about 45 minutes.
  4. After 45 minutes, remove the foil and mix to combine. Place back in the oven and bake for 15 more minutes.
  5. Meanwhile, prepare the crumble by placing all of the ingredients in a bowl: almond flour, remaining butter, sweetener, cinnamon and salt. Using your hand, combine until you get a thick dough.
  6. Crumble the prepared dough over the fruit base and place in the oven. Bake for 8 to 10 minutes, or until the crumble topping is lightly golden.
  7. Remove from the oven, place on a cooling rack.
  8. Serve with a dollop of full-fat yogurt, mascarpone, whipped cream, sour cream, coconut yogurt or coconut cream. Once cool, store in the fridge for up to 5 days.


from KetoDiet Blog https://ift.tt/3BZdkLM
via IFTTT

Low-Carb Apple Crumble For Two

Have you ever made black pasta? These keto noodles look just as cool as squid ink spaghetti but with none of the carbs!

It's just as easy as the basic Keto Spaghetti Noodles, plus we're adding a tablespoon of squid ink for naturally black effect. These noodles have a mildly briny flavor and will add a dramatic black color, making it perfect for the spooky season.

Serve them with Classic Marinara Sauce or pesto and add some seafood for the ultimate Halloween-inspired pasta dinner recipe. And it's not just seafood, it will work well with chicken and some White Cheese Sauce too!

Adapted from Ann's Original Keto Pasta Recipe

Just like the basic recipe, this one has been adapted from Ann's Original Keto Egg Noodle recipe so make sure you give her some love on YouTube and check out her amazing recipe creations!

Recipe Tips

This recipe is based on the Keto Spaghetti Noodles but with the additional squid ink, no salt (squid ink is salty) and no xanthan gum (therefore less water).

There's no wheat gluten, no oat fibre, no nuts, no coconut, no psyllium, no dairy, and no cooking required. That means no sweetness or aftertaste from almond flour or coconut flour, and no tummy issues from oat fibre.

Apart from lupin flour, this keto pasta can be made with other options including bamboo flour, flax flour, coconut flour and almond flour. For a full list and amounts, check out the basic Keto Spaghetti Noodles recipe.

Ann recommends softening the noodles before cooking by pouring several cups of water to the prepared noodles, and adding 2 tablespoons of lemon or lime juice, plus 1 tablespoon of baking soda. I found that I did not need to soften mine but you may need to do this if you use Ann's original noodle recipe which is more sturdy.

Preparation time

Hands-on:    15 minutes
Overall:     1 hour 15 minutes

Nutritional values (per 100 g/ 3.5 oz noodles)

Total Carbs 1.6 grams
Fiber 1.4 grams
Net Carbs 0.2 grams
Protein 3.9 grams
Fat 2.3 grams
of which Saturated 0.7 grams
Energy 38 kcal
Magnesium 9 mg (2.17% RDA)
Potassium 35 mg (1.75% EMR)

Macronutrient ratio: Calories from carbs (3%), protein (41%), fat (56%)

Ingredients (makes about 1 kg noodles)

Noodles:
Water bath:

Instructions

  1. Start by pouring 3 1/2 cups (820 ml) of filtered water into a blender. Turn on the blender. Add 6 tablespoons of whole egg powder, 4 tablespoons of lupin flour and 1 tablespoon of squid ink. Keep blending for a few seconds. Then add 2 tablespoons of sodium alginate. Process until smooth, thick and creamy. Make sure there are no lumps.
  2. Pour the mixture in a bowl and use a rubber spatula to scrape any remaining mixture from the blender. Set aside to let the bubbles surface. Scrape the bubbles off with a rubber spatula to break. (You don't want too many bubbles in the mixture as that would cause the noodles to break.) Transfer the mixture into a squeeze bottle.
  3. Meanwhile, pour 7 cups (1.7 L) of filtered water into a bowl. Add 1 tablespoon of calcium lactate and stir until it's completely dissolved. This may take a few minutes.
  4. To make the noodles, start stirring the calcium lactate solution in one direction to create a whirlpool just like in the basic pasta recipe here. And if you're still not sure, here's a step-by-step video to help you make these noodles.
  5. Start squeezing the bottle to release the mixture into the water. The noodles will be as long as you keep pressing. Keep stirring and pressing until you use most of the mixture, and then refill the bottle and repeat the process.
  6. The noodles will still be too soft at this point. Place the bowl in the fridge for at least an hour or overnight. This will help the noodles set until firm enough.
  7. Drain and rinse the noodles and place in a container. Keep in the fridge for up to 5 days. (You don't have to keep them in water or the calcium lactate solution.)
  8. Serve just like spaghetti — heat up with sauces of choice! For serving suggestions, softening tips, swaps and more, check the recipe tips above.


from KetoDiet Blog https://ift.tt/3jfF0ox
via IFTTT

Keto Black Spaghetti Pasta Noodles

These Spooky Chocolate Mug Cakes are the perfect keto treat for Halloween, especially if you can involve the kids in the decorating process!

Just like all keto mug cakes, they are quick and easy to make. It will only take a few minutes, and you never have to worry about cake leftovers to freeze.

I wasn't able to find sugar-free edible eyes for decorating the mug cakes so I used regular sugar-based eyes and took them off just before eating.

Recipe Tips

Can't have dairy? If you need to make this mug cake dairy-free, simply use coconut cream instead of the cream cheese and whipping cream to make the frosting.

Keep in mind that this keto recipe makes a generous mug cake that will be great for breakfast but may be too much if eaten as an after dinner dessert. Feel free to make smaller mug cakes, or serve just half mug cake if the whole serving is too much for you. Instead of mug cakes, your could make 4 to 6 small muffins. A silicon muffin tray like this one can even be used in a microwave.

If you don't have a microwave, I suggest you double or triple the recipe. Preheat the oven to 175 °C/ 350 °F (fan assisted), or 195 °C/ 380 °F (conventional) and cook for about 15 minutes or until cooked in the centre. The time will depend on the size of each muffin.

Preparation time

Hands-on:     10 minutes
Overall:      10 minutes 

Nutritional values (per serving, 1 mug cake)

Total Carbs 10.6 grams
Fiber 5.4 grams
Net Carbs 5.2 grams
Protein 13.7 grams
Fat 25.3 grams
of which Saturated 10 grams
Energy 303 kcal
Magnesium 320 mg (80% RDA)
Potassium 1,034 mg (52% EMR)

Macronutrient ratio: Calories from carbs (7%), protein (18%), fat (75%)

Ingredients (makes 2 mug cakes)

Mug Cakes:
Frosting:

Instructions

  1. In a bowl beat the eggs with sweetener. Add the almond flour, Dutch process cocoa powder, black cocoa powder (or more Dutch process), coconut flour, baking powder and a pinch of salt.
  2. Beat until well combined.
  3. Divide the batter between two wide mugs or coffee cups and microwave on high for 90 seconds, or longer until cooked through in the middle. If still raw in the middle, add another 30 to 60 seconds to the cooking time. Let the mug cakes cool down completely before frosting. (For oven baking instructions, check the recipe tips above.)
  4. While they are cooling down, prepare the frosting. Place the cream cheese, cream and vanilla in a bowl. Using a baloon whisk, beat until stiff peaks form.
  5. Place the frosting in a piping bag and pipe on top to create a mummy effect, or simply use a spoon and spread on top of each mug cake. Optionally, pipe two small dots of frosting and add edible eyes to decorate the mug cakes (if you can't get sugar-free, you can take them off before eating).
  6. Enjoy immediately or store in the fridge for up to 3 days.


from KetoDiet Blog https://ift.tt/3AO1zXa
via IFTTT

Spooky Keto Chocolate Mug Cake

When I was looking for inspiration on what to make this year for Halloween, I just knew I needed to make these pastry snakes, the keto way!

These low-carb pastry snakes are deliciously light and crunchy with extra flavor from sesame seeds sprinkled on top. You'd be surprised just how much they taste like real puff pastry.

The dough is similar to the one used in our Keto Garlic Knots and Keto Panini but with the addition of xanthan gum, which makes this fat head dough easier to roll out and shape, just like these Keto Pretzels. And if it gets too firm to work with, simply warm the dough for 5 to 10 seconds in the microwave to make it a bit more pliable.

Looking for more sweet and savory recipes to make this Halloween? There are plenty more keto recipes here so make sure to check them out!

Preparation time

Hands-on:    15 minutes
Overall:     30 minutes

Nutritional values (per serving, 1 snake)

Total Carbs 4.1 grams
Fiber 1.7 grams
Net Carbs 2.4 grams
Protein 7.5 grams
Fat 13.2 grams
of which Saturated 4.2 grams
Energy 158 kcal
Magnesium 42 mg (10% RDA)
Potassium 128 mg (6% EMR)

Macronutrient ratio: Calories from carbs (6%), protein (19%), fat (75%)

Ingredients (makes 12 snakes)

  • 1 3/4 cups shredded low-moisture mozzarella cheese (200 g/ 7 oz)
  • 1 heaped tbsp cream cheese (30 g/ 1.1 oz)
  • 1 large egg
  • 1 1/2 cups almond flour (150 g/ 5.3 oz)
  • 2 tsp gluten-free baking powder
  • 2 tsp xanthan gum
  • 1 tsp sea salt
  • 2 tbsp unsalted butter, melted (30 ml)
  • 1 tbsp sesame seeds (9 g/ 0.3 oz)
  • 24 black peppercorns, for eyes

Instructions

  1. Preheat oven to 180 °C/ 355 °F (fan assisted), or 200 °C/ 400 °F (conventional).
  2. Place the mozzarella and cream cheese in a microwave safe bowl and heat on high for 1 minute. Remove and stir and then heat in 30 second bursts until the cheese is melted and smooth.
  3. Place the melted cheese, egg, almond flour, baking flour, xanthan gum and salt into a food processor.
  4. Process until thick dough forms. This will take just a few seconds. Alternatively, you can place the ingredients in a bowl and use a spatula to mix until well combined and thick dough forms.
  5. Divide the dough in two parts. Roll the first part of the dough out between 2 sheets of parchment paper until very thin (or use a silicon mat and silicon rolling pin like I did).
  6. Using a pizza cutter or a sharp knife, slice into 6 wide ribbons.
  7. Twist each one of them by grabbing on the opposite ends and then shape into a small snake, or make any shapes you like. Repeat for the remaining ribbons, and then repeat for the remaining half of the dough until you create a total of 12 snakes. Place them on a lined baking tray.
  8. Brush each one with melted butter and sprinkle with sesame seeds. Use 2 peppercorns per each snake to create eyes. Place in the oven and bake for 15 to 20 minutes, rotating the tray halfway to ensure even browning.
  9. Remove from the oven. Eat warm or cold, dipped in mustard (you can make your own mustard), sugar-free ketchup (you can make your own ketchup).
  10. Store, in an airtight container, in the pantry for up to five days. For longer storage, freeze for up to 3 months.


from KetoDiet Blog https://ift.tt/3DI4anq
via IFTTT

Keto Pastry Snakes

This must be the easiest ever pumpkin cheesecake!

You'll only need six common low-carb ingredients, plus water, and there's no baking and no crust required! The cheesecake mixture takes just about 15 minutes to prepare, plus a couple of hours chilling in the fridge. That's it!

And if pumpkin is not your thing, check out some of these tasty recipe variations:

Preparation time

Hands-on:     15 minutes
Overall:       2 hours

Nutritional values (per serving, about 130 g/ 4.6 oz)

Total Carbs 5.3 grams
Fiber 1.1 grams
Net Carbs 4.2 grams
Protein 4.4 grams
Fat 25.6 grams
of which Saturated 16.3 grams
Energy 255 kcal
Magnesium 12 mg (3% RDA)
Potassium 122 mg (6% EMR)

Macronutrient ratio: Calories from carbs (6%), protein (7%), fat (87%)

Ingredients (makes 8 servings)

Instructions

  1. In a small cup or bowl, sprinkle the gelatin over 1/4 cup (60 ml) cold water and let stand for a couple minutes to soften.
  2. Place the pumpkin puree, sweetener and pumpkin pie spice in a sauce pan. Bring to a simmer over a low heat.
  3. Add the bloomed gelatin and stir until it's fully dissolved.
  4. Take off the heat and set aside to cool down to room temperature. You can speed this up by placing the saucepan in a bowl filled with ice water.
  5. Add the whipping cream and cream cheese to a mixing bowl and use an electric mixer or a stand mixer to whip until fluffy.
  6. Add the cooled pumpkin mixture.
  7. Beat until well combined. Pour into a container or a pie dish.
  8. Refrigerate for at least an hour or until set.
  9. Serve as an after dinner dessert or for breakfast. To store, refrigerate for up to 5 days.


from KetoDiet Blog https://ift.tt/2XgxF08
via IFTTT

No Bake Keto Pumpkin Cheesecake

To Prepare and Cook Delicious Meal Read These Free Recipes - CLICK BELOW