I’ll be honest—before I started making my own, I used to think cream of mushroom soup only came in a can. You know the one. The thick, gloopy stuff that somehow finds its way into every casserole recipe from the ‘80s.

But once I made it from scratch? Game changer. This homemade version is rich, velvety, and packed with real mushroom flavor. The secret ingredient that makes a huge difference? Dried porcini mushrooms! They add so much flavor and once blended, they make this soup nice and creamy.

There are no weird additives, no strange aftertaste—just pure, creamy goodness. Plus, it’s not just for soup bowls! You can use it as a sauce over chicken, mix it into casseroles, or even thin it out for a lighter broth-style soup.

If you’ve only ever had the canned stuff, this will completely change the way you think about cream of mushroom soup. And the best part? It’s super easy to make!

Key Ingredients & Swaps

A good cream of mushroom soup starts with the right ingredients. Here’s what makes this version so flavorful, plus a few swaps if you need them:

  • Brown Mushrooms: These have a deeper flavor than white button mushrooms. You can also use a mix of mushrooms for variety.
  • Dried Porcini Mushrooms: The secret to that rich, earthy, umami-packed taste! If you don’t have them, you can use more fresh mushrooms, but the flavor won’t be as intense.
  • Onion & Garlic Essential for a flavorful base. Shallots work too if you want a slightly sweeter taste.
  • Chicken Stock or Bone Broth: Adds depth and nutrients. For a vegetarian version, use vegetable stock instead. It's so easy to make your own chicken stock or bone broth!
  • Heavy Whipping Cream: Makes the soup creamy and smooth. You can swap it with coconut cream for a dairy-free option, though the flavor will change slightly.
  • Dried Thyme or Tarragon: Both work well here. Fresh herbs can be used, but you’ll need a bit more.
  • Olive Oil: Used for sautéing the veggies. Butter or ghee are good alternatives.
  • Optional Topping: Fresh thyme or parsley for garnish and extra mushrooms for a crispy topping!

Is this like canned cream of mushroom soup?

This soup is not as thick as condensed cream of mushroom soup from a can, so it won’t work as a direct substitute in recipes calling for the condensed version. If you need it thicker, simmer it longer to reduce the liquid or blend in a little cream cheese for extra richness.

How can I add more protein to this soup?

If you’d like to boost the protein content, here are a few easy options:

  • Shredded or diced chicken – Stir in cooked chicken for a heartier meal.
  • Crumbled bacon – Not just for flavor—bacon adds a bit of extra protein too!

Tips for The Best Cream of Mushroom Soup

These tips will help you get that perfect creamy texture and flavor every time:

  • Use dried porcini mushrooms – Soaking them in hot water is crucial for the perfect texture and flavor.
  • Adjust the thickness – If you prefer a thicker soup, let it simmer longer before blending. Alternatively, you can you some of the tips here to make the soup thicker. If you like it thinner, just add a little more broth or cream.
  • Season at the end – Since the soup reduces as it cooks, adding salt too early can make it too salty. Taste and adjust at the end.
  • Make it extra fancy – Top with crispy mushrooms or a drizzle of truffle oil for extra depth.

How to Make Crispy Mushroom Topping

For an optional crunchy garnish, try these crispy mushrooms! Simply slice a few fresh mushrooms and place them in the air fryer in a single layer. Brush with olive oil and season with salt and pepper. Cook at 400°F (200°C) for about 8 minutes, or until golden and crispy. Remember, mushrooms shrink a lot when cooked, so place as many as you can in a single layer!

Storage Tips

Store leftovers in an airtight container in the fridge for up to five days. Reheat gently on the stovetop or in the microwave, stirring occasionally. If you plan to freeze it, don’t add the cream yet! Freeze the soup without it, then when you’re ready to serve, defrost, reheat, and whisk in the cream for the best texture.

Serving Suggestions

This soup is super versatile! Here are some ways to enjoy it:

  • As a light meal - Enjoy a warm bowl on its own or pair it with a slice of keto bread for a simple, satisfying lunch or dinner.
  • As an appetizer - Serve before a main dish. It's a great starter for almost any meal.
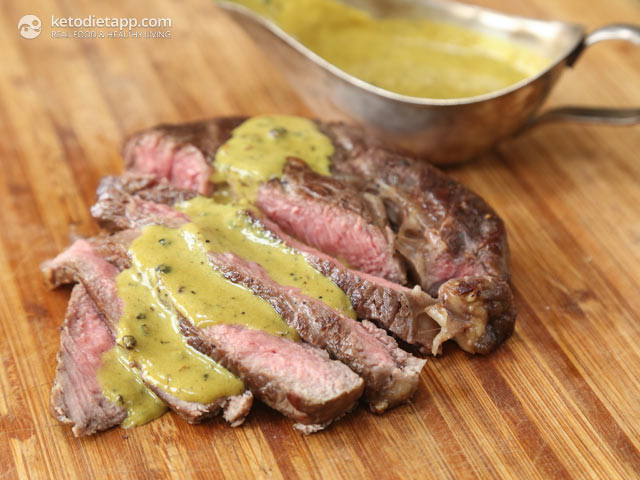
  • As a sauce – The base recipe isn’t as thick as a gravy, but you can easily reduce it by simmering until it reaches your desired consistency. Pour over roasted chicken, pork chops, or even a juicy steak.
  • In casseroles – Use it as a base for low-carb casseroles instead of store-bought soup. Again, if you need this soup to be thicker, reduce slightly on the stove before adding to the casserole.
  • With a side of crunch – Pair with keto-friendly crackers, low-carb bread or crispy mushrooms for texture.
  • Thinned out as a broth – Add extra broth or stock to turn it into a lighter mushroom soup.

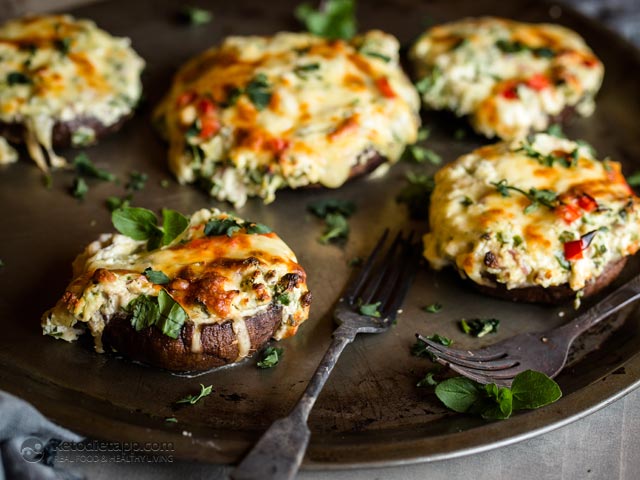
Popular Low-Carb Recipes with Mushrooms

Love mushrooms? Here are some of our most popular recipes!

Preparation time

Hands-on:    15 minutes
Overall:     35-40 minutes

Nutritional values (per serving, about 1 cup, 240 ml)

Total Carbs 8.4 grams
Fiber 1.2 grams
Net Carbs 7.2 grams
Protein 5.6 grams
Fat 24.5 grams
of which Saturated 11.8 grams
Energy 271 kcal
Magnesium 22 mg (5% RDA)
Potassium 572 mg (29% EMR)

Macronutrient ratio: Calories from carbs (11%), protein (8%), fat (81%)

Ingredients (makes 6 servings)

  • 450 g brown mushrooms, sliced (1 lb)
  • 1 medium brown onion, diced (110 g/ 3.9 oz)
  • 3 cloves garlic, minced
  • 1/2 cup dried porcini mushrooms (15 g/ 0.5 oz)
  • 1 cup boiling water (240 ml/ 8 fl oz)
  • 3 tbsp extra virgin olive oil (45 ml)
  • 3 cups chicken stock or bone broth (720 ml/ 24 fl oz)
  • 1 tsp dried thyme or tarragon
  • 1 cup heavy whipping cream (240 ml/ 8 fl oz)
  • 1 tsp sea sea salt, or to taste
  • black pepper, to taste
  • Optional: fresh thyme or parsley for topping
  • Optional: more mushrooms for making mushroom chip topping

Instructions

  1. Prep the ingredients. Slice the fresh mushrooms, dice the onion, and mince the garlic.
  2. Place the porcini mushrooms in a bowl and cover with 1 cup (240 ml) of boiling water. Let them soak while you start cooking.
  3. Heat the olive oil in a deep skillet or soup pot over medium heat. Add the diced onion and cook for about 3 minutes until softened and lightly browned.
  4. Add the minced garlic and sliced fresh mushrooms. Stir and sauté for 5 to 8 minutes until they are lightly browned and start to soften.
  5. Pour in the chicken stock (or bone broth), add the soaked porcini mushrooms along with their soaking liquid, and sprinkle in the dried thyme. Increase the heat to medium-high. Bring to a boil, then reduce heat to medium-low, and let simmer, uncovered, for 10 to 12 minutes.
  6. Remove from heat, pour in the cream, and season with salt and pepper. Let cool slightly before blending until creamy. A high-speed blender works best, but an immersion blender can also be used. Taste and adjust seasoning if needed.
  7. Pour into bowls and top with crispy mushrooms (see tips above) and fresh thyme if desired.


from KetoDiet Blog https://ift.tt/jncLOfh
via IFTTT

The Best Cream of Mushroom Soup

Quick Summary tl;dr

Dirty Keto sticks to low-carb, high-fat goals but doesn’t focus on food quality. It can be convenient and might jumpstart weight loss, but it often comes with fewer nutrients and potentially questionable ingredients.

Clean Keto emphasizes whole, nutrient-dense foods—helping you get vitamins, minerals, and better long-term health benefits, though it can require more planning.

Pros of Dirty Keto: Quick results, easy to follow, flexible with food choices, and potentially budget-friendly.

Cons of Dirty Keto: Potential nutrient gaps, reliance on processed options, and higher risk of long-term health concerns.

Making Dirty Keto Healthier: Instead aiming for perfection and removing all foods that are not "squeaky clean", focus on adding healthy options. Try blending convenience foods with whole foods, choose better fats, read labels, stay hydrated, and supplement when needed.

Reality Check: Very few people follow a perfectly “clean” keto diet 24/7. What really matters is finding a balance that keeps your carb intake low without making the lifestyle feel overwhelming or unsustainable.

Bottom Line: Dirty Keto can work if you’re consistent about carb limits, but focusing on nutrient-dense foods is key to feeling better and maintaining your results over time.

Table of Contents

Ever heard of “Dirty Keto” but not entirely sure what sets it apart from a regular keto diet? If you’ve been eating low-carb, you know the goal is to keep carbs down. But Dirty Keto adds a twist: it doesn’t focus much on food quality. Think fast foods, processed snacks, and convenience items—all technically “keto” if they keep your carb count low.

Sounds simple, right? I’ve been low-carb for over a decade and have tried it all. I’ve also seen firsthand how it can transform lives far beyond weight loss—our app users have collectively lost tens of thousands of pounds, regained their energy levels, and even managed to get off medication. Before you jump in, it’s worth asking whether a lower-carb approach is all it takes for good health.

In this article, I’ll give you the basics of Dirty Keto, explain how it stacks up against a cleaner approach, and share why just staying under a certain carb number might not be the whole picture.

What Is Dirty Keto?

If you’re new to keto, you probably already know the main rule: keep your carbs low and your fats high. But when it comes to overall food quality, that’s where things can differ. Dirty Keto is often summed up as “ALAYMYM”—as long as you meet your macros. It puts most of the focus on hitting daily carb and fat targets rather than worrying about how nutritious or processed the foods might be.

For instance, on a more “clean” keto plan, you might reach for salmon, avocado, and cauliflower. On Dirty Keto, it might look more like a ready-made keto bread with a long list of ingredients, snack bars made with IMOs (isomalto-oligosaccharides), or a fast-food meal cooked in vegetable oil paired with rapeseed-based mayonnaise. Sure, you can still reach ketosis by doing this, but does it cover all the bases for good health? That’s the big question.

While it can be tempting to view keto simply as a low-carb, high-fat weight-loss tool, we know that food quality matters—especially if you want benefits that go beyond the scale. Understanding the difference between Dirty Keto and a cleaner approach is the first step to deciding what’s right for you.

Key Differences: Dirty Keto vs. Clean Keto

What really sets Dirty Keto apart from a more traditional, cleaner approach? While both aim for low carbs and high fats, the overall food choices can shape how you feel—and how healthy your diet is in the long run. Here are the main differences:

Food Quality

  • Clean Keto: Usually emphasizes whole, nutrient-dense foods like avocados, leafy greens, and quality proteins (e.g., wild-caught salmon or pasture-raised eggs).
  • Dirty Keto: Might include a takeaway bunless burger and coleslaw with rapeseed oil-based mayo, or a “keto-friendly” full English breakfast that skips bread and beans but still has sausages containing starches and fillers. You may stay under your carb limit, but the nutritional value often pales in comparison to whole foods.

Nutrient Profile

  • Clean Keto: Tends to provide higher levels of vitamins, minerals, and antioxidants because it relies on fresh, unprocessed ingredients.
  • Dirty Keto: Helps you reach ketosis by keeping carbs low but might leave gaps in essential nutrients. Regularly consuming processed snacks, oils, or packaged meals can contribute to missing out on fiber and micronutrients.

Long-Term Health

  • Clean Keto: Supports better overall health by combining low-carb principles with balanced meals.
  • Dirty Keto: When you focus mostly on “ALAYMYM” (as long as you meet your macros), you could unintentionally overlook essential nutrients. Over time, this might lead to deficiencies or other health concerns, especially when you include high amounts of inflammatory oils, food dyes and preservatives.

Sustainability

  • Clean Keto: While it may take more planning, many find it easier to keep up with a diet rich in whole foods—and you’re more likely to feel satisfied.
  • Dirty Keto: Convenience foods can make life simpler, at least in the short run. But over time, you might notice less energy or even cravings if your meals lack essential nutrients. It’s not about being perfect 100% of the time, but rather aiming for healthier choices whenever possible.

Pros and Cons of Dirty Keto

When you rely on ALAYMYM (as long as you meet your macros), there’s no question that Dirty Keto can keep carbs low and maintain ketosis. But it also comes with some clear trade-offs. Here’s a closer look at both sides:

Pros

  • Easy to Follow: Dirty Keto can be simpler for busy schedules. You can grab ready-made keto breads, fast-food options, or packaged snacks without spending extra time cooking.
  • Fast Results (at First): If your main goal is quick weight loss or getting into ketosis, Dirty Keto might deliver—especially if you’re strict about carb limits.
  • Less Restriction on Food Choices: Craving a burger without the bun or a “keto-friendly” snack bar? Dirty Keto says go for it, as long as you’re within your macro range.
  • Possibly Budget-Friendly: Depending on your approach, Dirty Keto could cost less if you rely on cheap convenience items or fast-food specials. (Though keep in mind, some processed “keto” products can get pricey.)

Cons

  • Nutrient Gaps: Processed foods often lack essential vitamins, minerals, and fiber. Over time, this could leave you with deficiencies or digestive issues.
  • Potential Long-Term Health Concerns: Many processed items include questionable ingredients such as inflammatory oils, added sugars, artificial sweeteners or fillers. Relying on these all the time can affect your heart health, gut health, and more.
  • Quality Matters for Weight Maintenance: You might lose weight initially, but eating nutrient-poor foods can lead to cravings, energy crashes, and difficulty maintaining results.
  • Taste and Satisfaction: While convenience is nice, consistently eating processed meals can get monotonous. Balancing with some whole foods can help you feel more energized and satisfied.

Making Dirty Keto Healthier: Practical Tips and Strategies

Dirty Keto doesn’t have to be all fast food and processed meals. If you’re aiming for a more balanced approach—even when convenience is a priority—these tips can help you bridge the gap:

Balance Out Processed Foods

Enjoying a store-bought keto bread or snack bar can help you stay on track, but try pairing it with whole foods whenever possible. For instance, top your ready-made bread with avocado or add a side of leafy greens for extra vitamins and minerals.

  • Minimize Snacking: Whenever you can, opt for satisfying meals with plenty of protein, healthy fats, and low-carb vegetables, so you’re not constantly grazing. If you do need a quick boost or a travel-friendly snack, consider more natural options like House of Macadamia snack bars. (You can simply use the link, or use the code KDA at checkout to get 10% off.)
  • Eating Out Smart: It’s tough to control the oils and cooking methods used at restaurants. Skip mayo made with inflammatory oils, watch out for sugary sauces, and try to stick to simpler preparations like grilled meats and veggies drizzled with olive oil or cooked in butter. Small tweaks like these can help you avoid unnecessary fillers and keep your meal as keto-friendly as possible.

Free eBook Download

Add More Nutrient-Dense Options

Aim to include a variety of vegetables, protein sources, and natural fats. It’s not about being perfect; small changes—like adding zucchini noodles or a side salad—can make a big difference in meeting your nutrient needs.

Choose Better Fats

Instead of relying solely on vegetable or seed oils, look for healthier options like extra-virgin olive oil or coconut oil. They can help reduce unwanted additives and boost the nutritional value of your meals. Macadamias are also an excellent source of healthy fats—I’ve been a fan for years! If you’d like to try my favorite macadamia-based snacks, click here,, or use the code KDA at checkout for 10% off.

For a more comprehensive look at the best fats to include for optimal health, check out this guide.

Read Labels Carefully

Even “keto-friendly” snacks can hide fillers, sugars, or questionable ingredients. Make it a habit to glance at labels for carb counts, added sugars, and artificial flavors. The more aware you are, the easier it is to pick products that truly fit your goals.

Stay Hydrated and Supplement if Needed

Processed foods don’t always provide the electrolytes, vitamins, or fiber your body craves. Consider supplements or electrolyte drinks if you find you’re lacking key nutrients.

Plan Ahead

Meal prepping or even just sketching out a weekly menu can help you balance convenience foods with healthier picks. It cuts down on last-minute drive-thru choices and keeps you focused on your long-term goals. If you’re looking for extra help, our app includes free planning and tracking—no subscription required. If you’d like personalized features, the premium upgrade costs less than $2 per week, and you can click here or use code KETO25 for 25% off our annual membership.

Listen to Your Body

Pay attention to energy levels, cravings, and how you feel after meals. If you notice fatigue or constant hunger, it might be a signal to swap in more whole foods or adjust your overall approach.

By taking a few extra steps, you can enjoy the flexibility of Dirty Keto while still getting a boost of nutrients—and potentially better long-term results.

Dirty Keto Isn’t Always So ‘Dirty’

Personally, I’m not a fan of super-strict, almost cult-like thinking when it comes to healthy eating. Over the years, I’ve noticed that those who preach a perfectly “clean” approach don’t necessarily follow it themselves 100% of the time.

In reality, “dirty keto” is more of a spectrum than a strictly defined diet—few people maintain a spotless keto plan all the time, and that’s okay. Instead, it’s about finding a balance between convenience and quality, so you can stick with keto in the long run without feeling overwhelmed or worrying it’s unsustainable.

Conclusion

Dirty Keto might look tempting if you’re short on time or simply want a more flexible way to stay under your carb limit. It can help kickstart weight loss by sticking to the basics—low carbs, high fat. However, if you care about long-term health and better energy, it pays to look beyond just meeting macros.

Instead of overhauling your diet overnight, focus on adding healthy options (like leafy greens, high-quality proteins, and wholesome fats) rather than trying to remove every less-ideal choice at once. This gradual shift keeps the pressure low and makes it easier to maintain your momentum. By blending a few convenient Dirty Keto picks with a variety of nutritious whole foods, you’ll find a balance that supports your goals—whether that’s weight loss, better overall wellness, or both.

Remember, keto isn’t just about dropping carbs or chasing numbers on the scale. It’s about creating an eating pattern that feels right for your body and lifestyle in the long run. If Dirty Keto helps you stay on track occasionally, great—but don’t forget the power of nutrient-rich, whole-food meals to truly fuel and nourish you.


from KetoDiet Blog https://ift.tt/46wiQMZ
via IFTTT

Dirty Keto Debunked: The Pros, Cons, and Practical Tips

Today, I’ve got a special treat that’s sure to satisfy any chocolate lover’s cravings! You really need to make these fudgy, rich keto brownie truffles coated in dark chocolate and crunchy macadamias. If you’ve been following my recipes, you know I’m a big fan of RxSugar Allulose, especially their keto-friendly, sugar-free brownie mix. It’s so easy; all you need is water to make delicious, guilt-free brownies!

These brownies are fantastic on their own, but I wanted to take them up a notch by turning them into these decadent truffles. With just a few simple steps, you can enjoy a low-carb dessert that feels truly indulgent without any of the sugar.

Key Ingredients & Easy Swaps

To make these truffles just right, here are some key ingredients and a few simple swaps you can use to customize the flavor:

  • RxSugar Keto Brownie Mix: The star of this recipe, RxSugar's Keto Brownie Mix (use this link to het 20% off) makes it easy to keep things low-carb and sugar-free. All you need is water to prepare the brownies, so it’s super convenient!
  • Mascarpone or Cream Cheese: Adds creaminess and helps bind the truffles. You can use either mascarpone for a richer taste or cream cheese for a slightly tangier twist. For a dairy-free option, use thick coconut cream.
  • Macadamia Nuts: For a delicious crunch, crushed macadamias add the perfect texture and taste to the truffles. If you’d like to try other flavors, swap them out for crushed pistachios, pecans, or toasted shredded coconut. Roasted nuts or coconut can give an even deeper flavor, and for a unique twist, try freeze-dried berries.
  • Dark Chocolate: For the chocolate coating, use 100% dark chocolate to keep the sugar low. For a milder coating, blend 3 oz of 100% chocolate with 1 oz of cacao butter.
  • Optional Flavor Variations: Add-ins like orange zest, vanilla, cinnamon, or peppermint extract can bring out festive flavors. You can also add a splash of rum, whiskey, or bourbon for a festive taste.

Can I use homemade brownie mix?

If RxSugar brownie mix isn’t available in your area, you can use this keto brownie mug cake recipe as a substitute. Simply triple the recipe to get a similar amount to use in this truffle recipe.

Tips for Making the Perfect Brownie Truffles

For the best truffles, here are a few essential tips:

  • Gentle Cooking: Chocolate can burn easily, so use low heat settings if microwaving. For best results, microwave at half power, rotating the bowl a quarter turn every 30 seconds if your microwave doesn’t have a rotating plate.
  • Extra Crunch Options: For added texture, you can mix in extra chopped nuts or chocolate chunks before coating the truffles.
  • Oven Option: If you prefer to use the oven instead of the microwave, bake the brownie mixture at 175°C (350°F) fan-assisted, or 195°C (380°F) conventional for about 15 minutes. If using a smaller, deeper dish, you may need to adjust the baking time slightly as it will take longer to cook through and set.
  • Roasting Macadamias: If you choose roasted macadamias for coating, keep in mind that macadamias are more resilient than most nuts. They can be roasted at 300°F (150°C) without causing significant oxidation to their fats, unlike walnuts, which are best kept below 265°F (130°C). You can learn all about macadamia nuts in this post.

Storage Tips

Store these truffles in an airtight container in the fridge for up to 1 week to keep them fresh and maintain their texture. For longer storage, place the truffles in a freezer-safe container and freeze for up to 3 months. Thaw them in the refrigerator for a few hours before serving.

These truffles are best enjoyed chilled or at room temperature—perfect for a quick, grab-and-go treat!

Recipes with Allulose You Will Love

If you’re loving these brownie truffles, here are some more low-carb recipes using allulose that make fantastic treats and pair perfectly with a keto lifestyle.

Preparation time

Hands-on:    20 minutes
Overall:      1 hour

Nutritional values (per serving, 1 truffle)

Total Carbs 3.6 grams
Fiber 2.3 grams
Net Carbs 1.3 grams
Protein 3 grams
Fat 10.5 grams
of which Saturated 4.9 grams
Energy 117 kcal
Magnesium 21 mg (5% RDA)
Potassium 63 mg (3% EMR)

Macronutrient ratio: Calories from carbs (5%), protein (11%), fat (84%)

Ingredients (makes 15 truffles)

Instructions

  1. In a medium bowl, mix the RxSugar brownie mix with water until smooth. Pour the mixture into a large ramekin or silicone baking tray. Microwave on half power (500 W) for 3 to 4 minutes, checking every minute.
  2. Carefully remove from the microwave and transfer to a mixing bowl. Let the brownie mixture cool completely.
  3. Once cooled, add mascarpone (or cream cheese) to the brownie mixture, stirring until fully combined. Place the bowl in the fridge to chill for 30 minutes. Then, use a cookie scoop or dampened hands to shape into 15 truffles, about 20 g (0.7 oz) each. Arrange the truffles on a tray and freeze for at least 30 minutes, or up to 1 hour.
  4. While the truffles chill, melt the dark chocolate in a double boiler or in a glass bowl over a saucepan of simmering water, stirring until smooth. Let it cool slightly before coating, as overly warm chocolate may not coat evenly.
  5. Remove truffles from the freezer. Using a skewer or fork, dip each truffle into the melted chocolate, spooning over the chocolate to coat evenly. Rotate the truffle gently as the chocolate begins to set, then dip into the crushed macadamias. If any chocolate remains, drizzle it over the truffles. Remove the skewer and cover the hole with a dab of chocolate.
  6. Place each coated truffle on a tray lined with greaseproof paper and refrigerate for at least 15 minutes before serving. Store in the fridge for up to a week or freeze for up to 3 months.


from KetoDiet Blog https://ift.tt/Ky2TReQ
via IFTTT

Keto Chocolate Brownie Truffles

Missing scalloped potatoes on a low-carb or keto diet? This recipe brings you all the creamy, cozy flavors you crave, with a French twist inspired by gratin dauphinois! By using kohlrabi—a mild, neutral-tasting veggie that soaks up the rich, velvety sauce beautifully—you’ll get the same luxurious texture without the carbs.

If you’re looking to mix things up, other low-carb veggies like rutabaga, turnips, celeriac, jicama, or chayote work great too, each adding a unique twist to this classic comfort food. In fact, I made a version with rutabaga (swede) several years ago.

This keto scalloped “potato” dish pairs well with almost any main course, making it perfect for holiday dinners, family gatherings, or cozy weeknights at home.

Why You’ll Love This Recipe

  • Keto-Friendly Comfort Food: All the cozy vibes of scalloped potatoes, without the carbs.
  • Simple Ingredients: Only a handful of basics needed—no fancy ingredients here.
  • Customizable: If kohlrabi isn't in season, use other potato swaps like rutabaga (swede) or turnips.
  • Perfect for Any Occasion: Great as a side for holidays or an easy weeknight meal.
  • Easy to Reheat: Stays creamy and delicious, even as leftovers.

Key Ingredients & Swaps

This recipe uses just a few simple ingredients that create a creamy, flavorful side dish. Here’s a quick breakdown, plus some low-carb swap options:

  • Kohlrabi: The star of the dish! Kohlrabi has a mild, neutral taste and a firm, slightly crisp texture that softens beautifully when cooked. It’s an ideal low-carb potato substitute, but you can also use other keto-friendly veggies like rutabaga, turnips, celeriac, jicama, or chayote if you want to change things up.
  • Heavy Cream: Provides richness and that classic creamy texture. For a dairy-free option, you could try coconut cream, though it will alter the taste.
  • Butter or Ghee: Adds depth and richness. Both work well, so feel free to use whichever you prefer.
  • Egg Yolks: These help thicken the sauce. They’re essential for that creamy, custard-like consistency, so no skipping!
  • Onion and Garlic Powder: Simple seasonings that add a savory boost without overpowering. You can adjust these to taste, or try a dash of nutmeg for a warm twist.
  • Fresh Herbs: Parsley, chives, or spring onions are optional but add a fresh, bright flavor to the finished dish.

Tips for Making the Perfect Low-Carb Scalloped Potatoes

These tips will help you get that perfect creamy texture and flavor every time:

  • Slice Evenly: Aim for thin, even slices of kohlrabi so they cook at the same rate.
  • Cook Before Baking: Boiling the kohlrabi until just tender ensures it bakes evenly and absorbs more flavor. Do not skip this step as the topping would burn before the kohlrabi gets tender.
  • Temper the Egg Yolks: When adding hot cream to the yolks, go slowly to prevent curdling. This step gives the sauce a smooth, custard-like texture.
  • Bake Until Golden: Look for a lightly golden top and bubbly edges to know it’s done.
  • Let It Cool a Bit: Allow the dish to cool for a few minutes before serving.

Storage and Serving Tips

To store, let the scalloped kohlrabi cool completely, then cover and refrigerate for up to 5 days. For best results, reheat in the oven at 350°F (175°C) for about 15-20 minutes, or until warmed through. You can also reheat in the microwave in 30-second intervals until hot, though the oven will keep the texture creamier.

Serving Suggestions

This low-carb scalloped “potatoes” dish pairs wonderfully with a variety of mains and sides, making it a versatile choice for any meal. Here are a few great options to try it with:

Preparation time

Hands-on:    20 minutes
Overall:      1 hour

Nutritional values (per serving, about 225 g/ 8 oz)

Total Carbs 12.6 grams
Fiber 5.9 grams
Net Carbs 6.7 grams
Protein 5.6 grams
Fat 28 grams
of which Saturated 17 grams
Energy 319 kcal
Magnesium 37 mg (9% RDA)
Potassium 631 mg (32% EMR)

Macronutrient ratio: Calories from carbs (9%), protein (7%), fat (84%)

Ingredients (makes 5 servings)

  • 4 kohlrabi (1 kg/ 2.2 lbs)
  • 1 tbsp butter or ghee (15 g/0.5 oz)
  • 1 1/4 heavy whipping cream (300 ml/ 10 fl oz)
  • 1/2 cup water (60 ml/ 2 fl oz)
  • 3 large egg yolks
  • 1 tsp onion powder
  • 1/2 tsp garlic powder
  • salt and pepper, to taste
  • fresh herbs such as parsley, chives or spring onions, to serve

Instructions

  1. Peel the kohlrabi. Cut it in half and then cut into thin slices, about 1/2 cm (1/4 inch) each.
    Note: You'll need about 4 pieces, 1 kg/2.2 lbs kohlrabi to get about 800 g/1.76 lbs peeled kohlrabi.
  2. Place the kohlrabi slices in a pot filled with salted water. Bring to a boil over medium-high heat. Once boiling, reduce the heat, cover with a lid, and cook for about 20 to 25 minutes, or until tender.
    Note: If using any other potato alternatives like rutabaga, turnips, or celeriac, cooking time will vary so make sure to start checking after 10 and 15 minutes.
  3. Once the kohlrabi has cooked, take off the heat and drain. Remove the lid and set aside to cool down. Once cool enough to touch, fold the slices vertically into a medium-sized baking dish (at least 1.5 to 2-quart/liter casserole dish). Preheat the oven to 190 °C/ 375 °F (fan assisted), or 210 °C/ 410 °F (conventional).
  4. Meanwhile, prepare the creamy sauce. In a small bowl, whisk the egg yolks, onion powder, and garlic powder. Season with a pinch of salt and pepper.
  5. Place the butter, cream, and water in a saucepan. Bring to a boil over medium-high heat. Once foam starts to form, take off the heat.
  6. While the cream mixture is still hot, use a ladle to gradually temper the hot cream into the egg yolk mixture, whisking constantly to avoid curdling. When you have added about half of the cream mixture, return everything into the pot with the remaining cream mixture, whisk vigorously, and cook until it reaches 70 °C/ 160 °F (about 5 minutes).
  7. Pour the hot cream mixture over the kohlrabi slices.
  8. Place in the oven and bake for 25 to 30 minutes, until the cream is set and caramelized. Bake longer if you prefer more browning on top.
  9. Remove from the oven and set aside to cool. Serve as a side with roasted meat, fish, or seafood. Optionally, sprinkle with fresh herbs such as parsley, chives, or spring onions. To store, let it cool down and refrigerate for up to 5 days. Reheat in the oven or microwave.


from KetoDiet Blog https://ift.tt/T789H51
via IFTTT

The Best Low-Carb Scalloped "Potatoes"

Halloween is the perfect time to try something different, and this Whole Baked Masala Cauliflower fits right in! With its rich, spiced coating and a look that’s kind of creepy (but in a good way), it’s a great way to bring some flavor to the table. Whether you’re hosting a spooky dinner or just want a new side dish, this cauliflower is easy to make, low-carb, and seriously tasty.

Key Ingredients & Swaps

This recipe keeps things simple but flavorful with a few key ingredients. Here’s what you’ll need and some ideas for easy swaps:

  • Cauliflower: The whole head of cauliflower is the base. If you prefer, you can use a smaller one, but adjust the cooking times to avoid overcooking.
  • Soft Cheese: Soft goat cheese adds a nice tang, but cream cheese is a great swap if you prefer something milder.
  • Tomato Paste: If you don’t have tomato paste (tomato puree), a thick tomato sauce could work.
  • Spices: Garam masala and curry powder bring in the classic masala flavors. You can adjust the spice level by using mild or hot curry powder. Don't have garam masala? A blend of cumin, coriander, and a little cinnamon will do the trick.
  • Olive Oil: You could swap it for avocado oil or melted ghee.
  • Herbs: Fresh parsley or cilantro are perfect to sprinkle on top, but you can use other fresh herbs you like, such as mint or chives, to change the flavor profile.

Tips for Making the Perfect Whole Baked Cauliflower

To get the best results with this dish, here are a few simple tips:

  • Don’t skip the steaming. Steaming the cauliflower first ensures it’s tender all the way through without drying out in the oven. Aim for crisp-tender when steaming, so it holds its shape while roasting.
  • Let the cauliflower cool a bit before marinating. This helps the cheesy masala coating stick better and not slide off.
  • Use a generous coating of the marinade. Make sure the cauliflower is completely covered with the spiced cheese mixture to maximize flavor and prevent it from drying out.
  • Broil for extra color. If you want an even crispier top, broil the cauliflower for the last few minutes of baking, but keep an eye on it so it doesn’t burn.
  • Play with the spice level. Adjust the curry powder or garam masala to your heat preference. For a spicier kick, you can add chili powder or fresh chopped chilies to the marinade.

Flavor Variations

Here are 10 Flavor Variations you can try for Whole Roasted Cauliflower:

  • Buffalo Cauliflower: Toss the cauliflower in buffalo sauce before roasting for a spicy, tangy kick. Serve with ranch or blue cheese dressing.
  • Lemon & Herb: Use a mixture of lemon juice, olive oil, garlic, and fresh herbs like rosemary, thyme, and parsley for a light, refreshing flavor.
  • Smoky Paprika: Mix smoked paprika, garlic powder, olive oil, and a touch of cumin for a deep, smoky flavor.
  • Garlic Parmesan: Coat the cauliflower with garlic, olive oil, and grated Parmesan for a savory, cheesy crust.
  • Tahini & Za’atar: Drizzle with tahini sauce and sprinkle with za’atar seasoning for a Middle Eastern-inspired variation.
  • Harissa Roasted: Spread a mix of harissa paste and olive oil for a bold, spicy North African twist.
  • Coconut Curry: Use coconut milk and curry paste for a creamy, tropical flavor that pairs well with cilantro and lime.
  • Honey/Maple Mustard Glazed: Combine allulose-based, honey or maple flavored syrup, Dijon mustard, and olive oil for a sweet and tangy glaze that caramelizes beautifully. I love RxSugar Allulose syrup - get 20% off by using this link (affiliate link) or by using the code KETODIET20 at checkout.
  • Chimichurri Cauliflower: Top the roasted cauliflower with a fresh chimichurri sauce made of parsley, garlic, olive oil, and red pepper flakes.
  • Pesto Crusted: Coat the cauliflower in a basil pesto or sun-dried tomato pesto for a rich, Italian-inspired finish.

Serving Suggestions

When it comes to serving, this Whole Baked Masala Cauliflower is versatile. It makes an excellent side dish, pairing well with grilled meats like chicken, lamb, or beef. For those looking for a lighter, low-carb option, it’s a great alternative to heavier sides like potatoes or rice.

If you prefer to serve it as a vegetarian main dish, a dollop of sour cream or a simple yogurt sauce on the side works wonderfully. You could also pair it with a fresh salad to keep the meal balanced. For a little extra texture and crunch, try sprinkling some toasted nuts or seeds, such as almonds, sesame, or pumpkin seeds, on top after baking.

Here are a few meat dishes to serve this whole baked masala cauliflower with:

Storage Tips

For storage, leftovers can be kept in an airtight container in the fridge for up to 3-4 days.

When you’re ready to reheat, the best method is to pop it back in the oven at 350°F (175°C) for about 10-15 minutes until warmed through. Microwaving is an option, but it may result in a softer texture.

If you want to freeze it, wrap the cauliflower tightly and store it in a freezer-safe container for up to 2 months. While reheating from frozen is possible, keep in mind that the texture will be softer than when freshly made.

Preparation time

Hands-on:    10 minutes
Overall:     1 hour

Nutritional values (per serving, 1/6th whole cauliflower)

Total Carbs 10 grams
Fiber 4 grams
Net Carbs 6 grams
Protein 9.7 grams
Fat 12.1 grams
of which Saturated 5.7 grams
Energy 177 kcal
Magnesium 35 mg (9% RDA)
Potassium 567 mg (28% EMR)

Macronutrient ratio: Calories from carbs (14%), protein (23%), fat (63%)

Ingredients (makes 6 servings)

  • 1 large cauliflower (1 kg/ 2.2 lbs)
  • 200 g soft goat's cheese or cream cheese (7.1 oz)
  • 4 tbsp tomato paste (60 g/ 2.1 oz)
  • 4 tbsp extra virgin olive oil (ml)
  • 1 1/2tsp garam masala
  • 1 1/2 tsp mild or hot curry powder
  • 1 tsp onion granules or 1/2 tsp onion powder
  • 1/2 tsp ground black pepper
  • 1 tsp sea salt
  • fresh parsley or cilantro, to serve

Instructions

  1. Start by steaming the whole cauliflower. To do this, place it in a steamer basket over a pot of simmering water, cover with a lid, and steam for 8 to 10 minutes until it's crisp-tender. If you don't have a steamer, you can place the cauliflower directly in a pot with about an inch of water, cover, and steam it that way. Once it's done, remove it from the heat and take off the lid to let the steam escape. Allow the cauliflower to cool on a chopping board until it's at about room temperature.
  2. While the cauliflower cools, mix the goat's cheese (or cream cheese), tomato paste, olive oil, garam masala, curry powder, onion granules (or powder), black pepper, and sea salt in a bowl using a fork or spatula until you have a smooth marinade.
  3. Preheat your oven to 400°F (200°C) for fan-assisted or 425°F (220°C) for conventional ovens. Once the cauliflower is cool enough to handle, cover it generously with the cheesy masala marinade, making sure to coat every part evenly.
  4. Place it on a baking tray lined with parchment paper.
  5. Roast the cauliflower in the oven for 30 to 35 minutes, until the coating is golden and slightly crispy. Remove it from the oven and allow it to cool for a few minutes before slicing.
  6. Serve warm as a side with your favorite meat dish, or enjoy it as a light meal with a dollop of sour cream or a fresh salad.


from KetoDiet Blog https://ift.tt/jUwkZgL
via IFTTT

Whole Baked Masala Cauliflower

To Prepare and Cook Delicious Meal Read These Free Recipes - CLICK BELOW